Wednesday, November 20, 2013

Fairy overdrive--Land Rover, parking brake

     I opened up the top of the overdrive to see if I could see why is wasn't working so well. I didn't like what I saw.


    First thing I noticed was that it was dry........either I didn't refill it after installation or it leaked out whilst sitting for the time it was sitting. I remember wiping oil off the bottom after the first test drive but not sure it was from the OD or when the valve cover was loose.
    The second thing I noticed was the brass selector guide on the top is broken and twisted. It doesn't show in the picture but I can see the loose piece down the side still in the selector ring groove. Hopefully none of the gears are broken.
    I pulled it out and took the one from my 88, Ignotus, and put it in the 109. On the first test drive on my street it didn't want to shift but a later drive got it shifting. It will have to work good a few more times before I totally trust it.

     The parking brake bits came in and I put on the shoes. What I found out is that there are 2 ways of mounting the shoes. In my Series 2-2a workbook it has them with the fully lined ends BOTH fitted to the adjuster housing plungers. The Series 3 workbook has the upper fully lined end toward the adjuster housing and the lower toward the expander housing.
    It took a few tries with getting the springs on both shoes and pulling and pushing and not having the lower plunger fall out to get them on but it was done!
    The drum was replaced and the expander was adjusted to tight on the drum and then the expander set bolts tightened(to center the shoes) and slackened 2 clicks where the drum was free to move. A quick test drive and the adjuster was slackened another click due to a slight drag on the drum.

All good now! Works a treat!

Land Rover door handles

    So it is raining now and I thought I would update my blog.

     Before the rains came I was able to put on my door handles. With the Iron Goat door cards on I scoped out where the handle reinforcing strip was and put a chalk string line across the door. Then I snapped a line. Measuring the length of the handle and subtracting that from the length of the center spot on the door card, then dividing that in half gave me 2 1/2" on either side of the handle to center it. Once centered and held in place I drilled a 1/8" pilot hole thru the handle holes.


     Then the door card was removed and 1/4" holes drilled in the door for the 10-24 rivnuts. With my cordless drill I installed the rivenuts.


     Gosh, I don't remember but I drilled something like 5/32" holes thru the door card for the screws to pass thru.  Once again the door card was reinstalled and the handle put on. This was done on both doors.


      I also measured and cut a piece of conveyor belting 36" wide and 76" long for my tub bed and slid that in.


     The new injector pump diaphragm came in and I put that on, It starts right up and no leaks.


Thursday, November 14, 2013

Driving the Land Rover 109!

     First, I got up today and went to the FLAPS and bought some hose clamps. Then I installed the second stainless heater tube. I think it went well.


     After the install I started it up and checked for leaks. I still have a seeping leak on the turbo oil return line. Nothing else was leaking!

    So that meant it was time to go for a drive!  For god's sake turn down the sound as my camera has a horrible scratchy noise. Sorry!


    My first thoughts were how easy it is to steer compared to the stock non-power steering. How nice the disc brakes were and the smoothness when it stopped. The motor is so much quieter than before the cam work was done, How high up it sits with the parabolics and 285's on it.
     I found myself slightly oversteering as I got use to the power steering needing such little input. Going down Highway 9(see video) was easy with only 1 hand on the wheel. I could put it in fourth gear and just cruise around 35-40mph. Step on the pedal and it would speed up. The oil pressure seemed to be high at first running around 50 and down to 30 at idle, towards the end of the day it was running around 40 and 20 at idle. I thought to myself this must be what it is like to drive a Defender..........


     I made it to Santa Cruz and went to visit Linus and gave him a ride around the block. Then I went to see Darin the welder to ask about a future project. Lastly I stopped to show Henry ar Water Star Motors, as he has helped with advice about diesels. He thought it was running well and sounding good!

    Next up I thought I'd take it on the freeway so I headed up to Scotts Valley on Hwy 17. No problem getting on the freeway and up to speed as it accelerated well with out clouds of smoke. Not quite as fast on acceleration as a V8 but much better than my 2.25D 88. I did have it floored on the way up the hll to Scotts Valley the speedo indicating 55mph, it was going as fast as the big rig in front of me. Once it leveled out I thought I would try the overdrive and shifted into it. Man that one whines!! But it did work, rpm's dropped and the speed stayed up. Soon it was time to exit the freeway.
    Once on the offramp I shifted out of overdrive and there was a grinding and it wouldn't go back into either gear. Lucky for me the light changed and I coasted down the hill and took the first right turn, keeping my momentum I coasted to a parking lot. Here I stopped and it went in gear. I kept it out of overdrive and drove the 13 miles back home. I'll look at things on the morrow.
     Overall I was pleased with the drive. The OD was scary though.(at least it is not leaking!)

Wednesday, November 13, 2013

Land Rover parking brake

   So I get up today and start moving vehicles around to get the 109 out on the road. I drove the 109 across the street and parked it and set the handbrake, it just rolled backwards................I thought I had it set up properly???

    I had to run an errand in town (more on that later) so I hopped in the 88 and did that. When I came home I changed clothes and crawled under the 109 to adjust the expander. Well it's tight as a nun and won't move in either direction. Off with the brake drum and try again, nothing moves. Off with the brake shoes and pull the adjuster.
   The crud in the pistons won't let them move, I had to pry them out with a screwdriver. Then I cleaned everything up and wirebrushed the bore with my Dremel tool and the pistons with a wire wheel. The adjuster was put in a vise and I used graphite lock lubricator to loosen the screw. This got it going but with a lot of effort on that 1/4" drive head. Putting it all back together with some Phil Wood waterproof grease got everything working properly.
    Then I went to clean the shoes and the drum, it seems some of the oil from the leaking something got on them. Well the shoes are shot.


    After a look in the parts book and the workshop manual I checked online to get updated parts numbers and check prices. A call was placed to Trevor at Rovah Farm, who picked up the phone. A little chit chat and discussion of late and early brake adjuster styles I placed an order. A set of new handbrake shoes #STC3821, a new dust cover(mine was gone) #515466 and the return spring for the handbrake lever(where did that go?) #59663. Ships on Thursday!

     With that out of the way I started work on tiding up the look of my engine bay. I had gone into town to pick up the stainless steel tubing I ordered from George Wilson Plumbing. I had 6' of 5/8"OD x.065wall  tubing. What was in my mind was to replace some of the heater hose with tubing ala Rover. Having only 1 of the 2 sections needed made from steel, I didn't put it in due to heavy rust, I just had hose from head to heater.


        The old tube was used as a template and I blindly followed that. To make my bends I had set a piece of 2" tube in my vise and heated the stainless with a propane torch and formed it around the 2" tube. I used a standard tubing cutter to cut to length. I was careful to keep the heat moving along the tube and this helped with not getting the tube flat in the bend. I also put a 1/2" bolt in the end of the tube where I used it as a fulcrum against the vise. This kept the end from deforming..


The ends were chamfered and the tube wire brushed to clean off the burnish. Because I just followed the orginal tube I had more fiddling to get it to fit my new motor configuration. I wound up bending about a 45 in it and removing 2 other smaller bends. Then it was installed.


     The second one was made in similar fashion but I didn't have enough hose clamps to install it. I think they will look nice for along time and still have enough hose to be flexible to move if the valve cover needs to come off.

Tuesday, November 12, 2013

Land Rover not leaking!

    Well, one of the options for stopping the leaking injector fuel pump came in late today. It is the one from Diamond Diesel in Oakland.


The individual bits were put together. First the 2 o-rings went on followed by the dowty washer. In the pic I put the ball in just to show where it fits.


    Then I went out and pulled the old leaky diaphragm out. I can now tell you that probably one reason that it leaked was due to no dowty washer..... The dowty washer is a split washer that evidently seals between the upper and lower parts of the bolt. On the packing invoice the dowty washer is called a backing ring and is part # 7182-423, a Delphi part.
    Here is a look up the headbolt hole;


   Then the ball was placed in the bolt and the bolt screwed into place. Once tightened there was no leak without pressure.


     After a short wait the motor was started. While still in the cab I could tell that it went to an even and stable idle very quickly. Before I would have to nurse it to idle until it warmed up a bit. This last pic is with the motor running and the pump at full pressure.   NO LEAKS!!!!!


   Tomorrow I go for a drive!!!!

     The new diaphragm part should be in within a week, it should have shipped from the UK, Barry4x4, today.

Friday, November 8, 2013

Land Rover 2.5DT dipstick

    If you have been following my blog(hell) you know that the dipstick tube was loose and I had to remove it and source a new one. If you haven't been following my hell(blog) you know now.

   After looking for the part number online and in my IPB #ERC8980. I called Trevor at Rovah Farm, http://rovahfarm.com/, because he had one on his website. Good thing we talked because he told me there were 2 types of fittings. One, like I had removed with fine thread on the fitting and another with coarse thread. The one I removed(fine) was determined to be 19 BSPP. Since at the time I didn't know which I had I had Trevor send one of each.

So here is a pic of the old and new fine thread fittings;


After the visual comparison I went out and removed the plug. That is when I found the thread damage.


     Then I tried to install the new tube with the fine thread. But it would not go on easily so I didn't try to force it. I took a close look at the plug threads and they seemed to be reformed in addition to torn off. I thought at this time I might need a tap to run down the hole. I called the Hose Shop to see if one was available as I was still convinced at this point that a fine thread fitting should be used after all that is what came out. No tap was available, so since I had time I thought I would try the other fitting with coarse thread.
    First since it looked larger I measured both the fittings OD's, the fine was .62 and the coarse was .67. Very close, the fine used an 11/16 wrench while the coarse used a 7/8". Next I used my mirror and a flashlight to try to see inside the hole. I could see that the threads were plainly coarse........
    Some previous owner or mechanic must have been very incompetent. Probably the same one who screwed up the cam and tappets............

Here's a pic of all the fittings together;

   It took a bit of work to get the tube and fitting in as I could only get it to turn one flat at a time and the wrench was too long to get good a fit.

     The coarse fitting which worked is part # ERC8980,  The fine thread fitting is part # 541860.

     Finally the tube was installed;


And the dipstick slid into place;


Now if only it won't leak.............

Thursday, November 7, 2013

injector pump leak on 109 Land Rover

    So there is no close by replacement for my leaking diaphram. The closest is 2 weeks out unless an Italian firm responds on Friday. The furthest is 4 months out. Diamond Diesel has come up with the head bolt replacement, non-diaphram, part. That and the correct washer are coming from New Jersey and Detroit at $106.00USD. OUCH!!! including shipping and will be here sometime around next Wed.

    Ted from the Mendo list has found the one 2 weeks out on; http://www.finditparts.com/t/4236/manufacturer/delphi/products/2373469/delphi-7174-665b

   David is going to look around the UK for something on Fri. new or used.

My thanks to all!

Wednesday, November 6, 2013

Land Rover leaking...

OK as promised here are the pics of stuff I have done.

First is the water pump bolts that leaked;


Next the plug in the dipstick hole;


Then there is the power outlet, it has a blue lite when energized;


The rest of the story is about the leaking injector pump. I struggled mightily today with it. For one thing it is difficult to get a wrench on the leaking diaphram. At first I thought it was just the crush washer leaking so I tightened the nut, once I found a small 3/4" wrench which would fit. It took me about 6 times crawling under and getting up to find the right size wrench. The diaphram is actually part of an automatic advance device for helping start up. After tightening it up it was restart and see if it leaked...which it did. So back under and this time I removed it and  checked the crush washer. It looked OK but I replaced it anyway and I put silicone on the washer/diaphram nut side. Then it was back under and re-install. Then up and restart and dive back under to see it leaking still....Out it comes again, this time I put silicon on both sides of the crushwasher and reinstall it. I wanted to let the silicon set up a bit this time
.


So I set about to make some floor mats for the front floor. I used the floor mats out of my 88 as a template and set them on a piece of conveyor belting I have.


I did the outline with a pencil and using my jigsaw and a rubber cutting blade I just cut them out.


Here are the drivers side and the passenger side mats;


After that was done I restarted the motor and checked the pump for leaks. It was still leaking, but this time I was able to get under the engine to see where it was coming from. Besides leaking on the top which I have always thought was the washers I was able to see fuel come out the breather hole in the bottom of the diaphram housing. Now I knew I would need a new one. Going back inside and on the computer I looked for proper terminology and hopefully a part number. I didn't find the part number but armed with the name I called up Diamond Diesel Service Inc. in Oakland, Ca. and talked with Terry. I didn't have the pump number onhand(it's somewhere) so I had to crawl under the 109 again and take a picture of the name plate on the underside. I couldn't read it from the ground but with the pic I could zoom in and read the number. Calling Diamond back I gave the number to Terry and he will call me back on Thursday with price and availability. And that is where I'm at this evening.


Tuesday, November 5, 2013

Land Rover test drive--Autumn edition

   It warmed up enough on Saturday to take the 109 down the street. I drove about a mile and turned off at the place I wished to turn around. When I pulled onto the side street I stopped and lifted the bonnet to check things out. To my dismay I found I had not retightened the valve cover.................Quickly the 13mm wrench was out of the tool roll and the cover tightened down. I could tell that leak was stopped but couldn't tell what else might be leaking.
    Then the 109 was turned around and I headed home. I could tell that it was running better than the last time I drove it, AND it was lots quieter! None of the exhaust leak or the clacking valve train noises. When the accelerator pedal was pushed slowly down the speed increased well. If done quickly a whole lot of pedal  down the exhaust let out a cloud of smoke as the turbo delayed kicking in.
     Once home the motor was cleaned of the oil and restarted. This way I could see the leaks. I had 1 of the injector fittings leaking(#3), 2 of the waterpump bolts were seeping, the timing plug on the side of the injector was leaking.

    I tightened the injector fitting and it still kept dripping, so I took it apart and cleaned it up and put it back together. This time it sealed and stopped dripping. If only the rest went that easy!
     With the injector timing plug I looked up the illustrated parts breakdown(IPB) and discovered that an o-ring probably was responsible for the leak. Next the plug was removed and I headed down to the FLAPS and found a new o-ring, I bought 2 spares too! I put it back together.
    While the motor was cooling down I tried tightening the waterpump bolts but that didn't work to stop the seeping. Then the 2.5Dt was started up again to see if the injector pump was fixed. ^%$#@#@! it still leaked! Not the plug though, it was leaking behind the plate the plug is mounted on, I never even took this off.  It was a miserable job to get to it. It also has those damable Torx anti-tamper screws(T25 if anyone cares), I had to use a 1/4' combo wrench on the Torx to remove and replace I can barely get my hand in there. Another trip to the IPB and I could see there was another o-ring behind the plate. So back to the FLAPS, this time no joy as the o-ring was thinner than the ones available. Next stop was the ACE hardware store in town. There I picked up 2 possible replacement o-rings as there was not a clear replacement fit.
    Returning to the Rover I tried the smaller of the 2 o-rings and it fit well. So the plate was refitted. The motor wiped down and restarted. Neither the injector fitting or the timing plate leaked! Since it was almost dark and the motor hot I elected to wait until the morrow to try to stop the water pump bolt seeping.

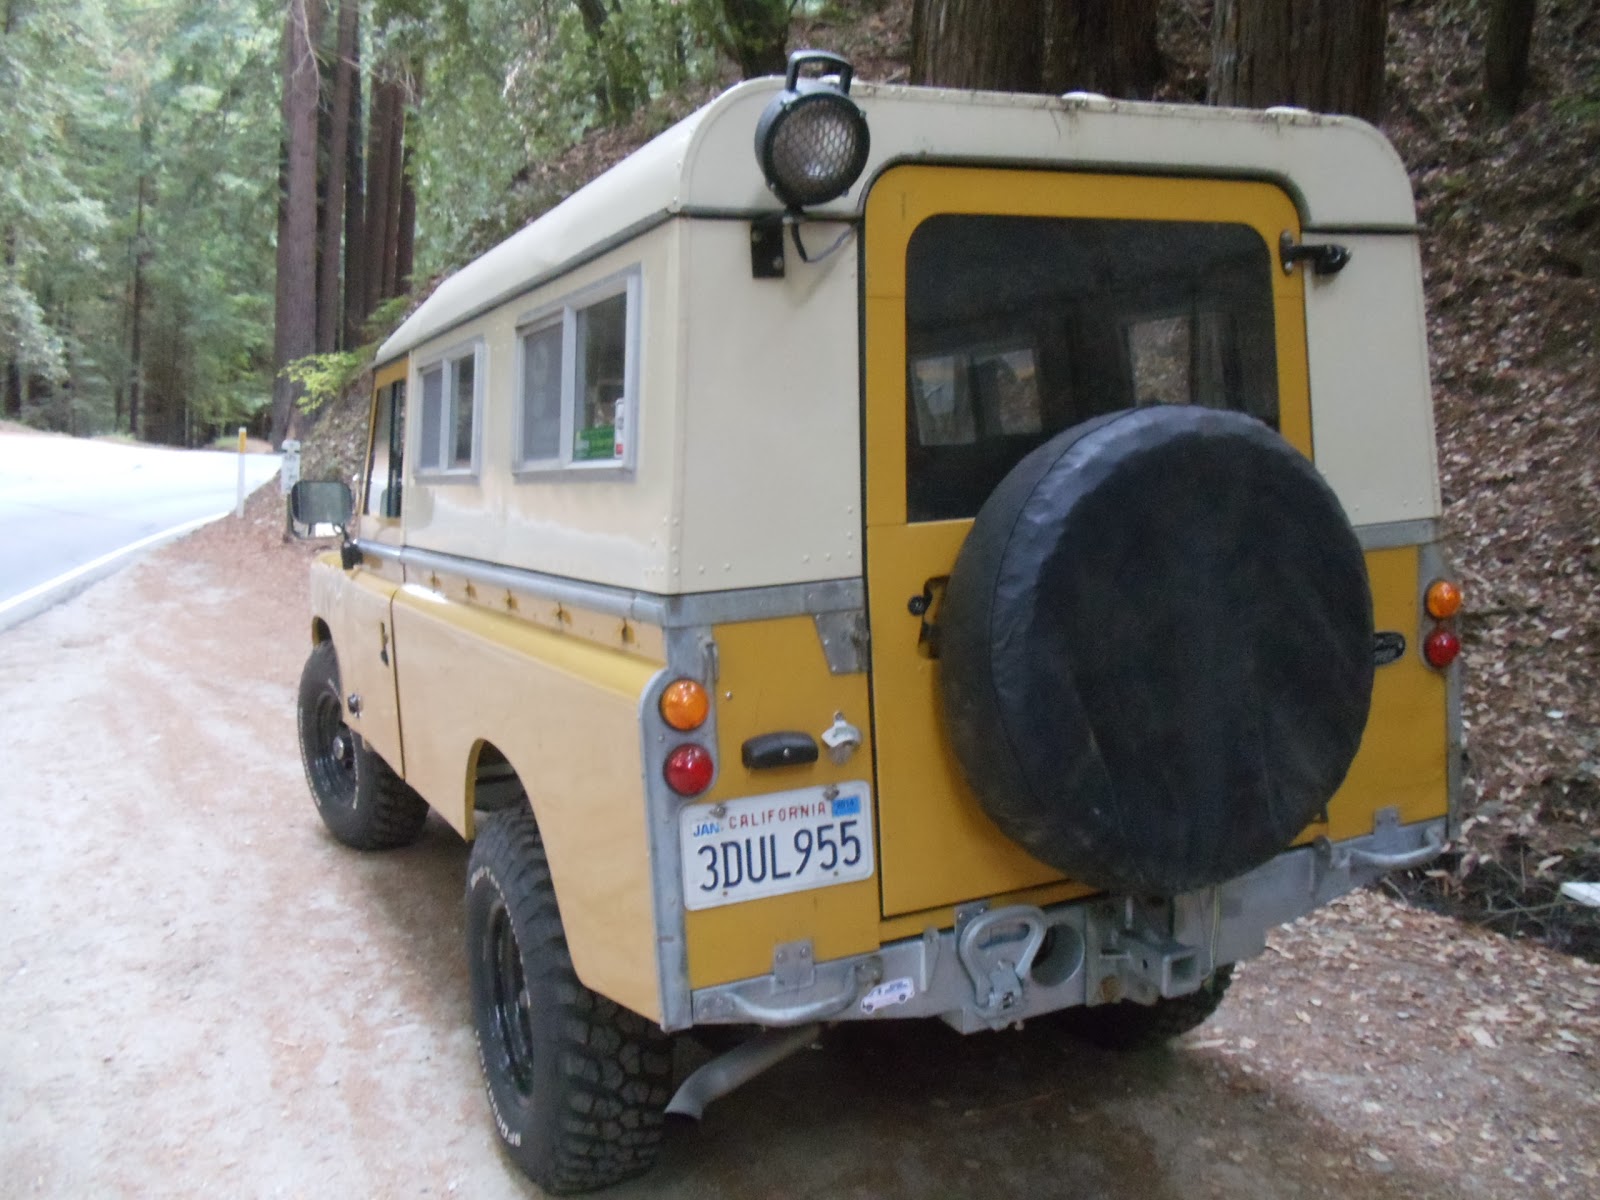
    SUNDAY; found me pulling the bolt out( at this time I thought it was only 1 bolt leaking) as far as I could and put some blue silicon around it and then I retightened it and wiped the motor clean,,again. I let it sit a while so the silly cone could set a bit.
    As it was setting up I installed a power outlet which combines USB and a cigarette style 12v port. This I located in the parcel tray just to the right of the dash. I also installed the trailer wiring harness. Now both my Landy's can pull my 88 tub trailer!
    Now a few hours have passed and the motor restarted and the leaks all rechecked. This is when I found that the bolt I put the silicon on was dribbling down on another bolt that was seeping. So that one also got the silicon treatment.  Hmmm almost dark again, time to clean up and eat.

MONDAY; I went out to start it and go for a test drive, but the starter would just turn and then the power went out. Sometimes the key turned and no power at all. I traced it down to a lose wire at the starter from the battery and the power feed from the battery to the fusebox. Once this was sorted I took it for another test drive after cleaning the motor and checking for leaks. Doing the same 2 mile trip. This time no big leaks at the turn around. When I get home I can see that the top waterpump bolt is still seeping. There are drips coming off the injector pump. The power steering pump hose has stopped leaking(tightened on Sunday).
    So I begin fussing with the injector pump. It is cleaned and then motor started. The timing plate is not the leak, it seems to be seeping from the timing advance diaphram that I worked on this summer. I am going to try tightening it up again when the motor is cool. That oil pan gets HOT!
     Dark thirty and I retire to my man cave.

TUESDAY; Today, I'm confident I have the leaks down to a dull roar so I'm going to drive it to town and run some errands and put some miles on it. I decided to check the oil, the level is fine but the dipstick tube is very loose. I know from our trip last year from Nebraska a loose tube will lose alot of oil!
    So back under the 109 I crawl, wrenches in hand. An18mm is too big but the 17 too fussy to fit. So I tighten up the fittiing, but the fitting won't go but maybe another thread tighter and still the tube flops around. Why didn't I notice this before? Next the fitting loosened and the tube removed. Now I can see that the threads have been buggered up by someone. I tried to clean them up with my jeweler files but despite my efforts it won't thread more than 1/3 of the way on.
    Bummer no test drive today! I searched the web and the IPB and got the part number for a new tube assy. Part # ERC8980, apparently it comes with the fitting preinstalled. I could not find a fitting listed seperately. I tried to figure out the thread pitch on the fitting but it was not SAE or Metric. So I found Rovah Farm showed then in stock so I gave Trevor a ring. Yes, he had them but they come in 2 different thread sizes and which one did I need? I asked him to send me one of each.............be here Saturday.

    So I was off to do some errands on my Suzuki and I took the tube with me. Obstensibly to show Linus at the Hose Shop what I tried to describe over the phone. Linus was able to figure out that it is 19BSPP thread. Then he dug out a fitting and a cap for it so I could plug the hole and still drive the 109. Once returned to my home I changed clothes and installed the plug, What a bear to get at; between the frame and motor next to the exhaust down pipe, can't get a wrench straight on it. I finally got it in and using all my extensions and the wobblie and a deep 7/8" socket I got it tight. Started the motor and no leak. By now it was dark again. The waterpump bolt still seeps so I will tackle that Wednesday and hopfully go for a drive.

Sorry there is no pics, I'll try to get some to-morrow.

Saturday, November 2, 2013