
I came upon this feller Jack Absalom who in the late 80 early 90's had some Aussie history travel TV shows, in them he would make survival tips for the outback. In the second one I watched called Red Dirt and Rockets( Skip to the 18:40 mark if you only want to see the cooker; https://www.youtube.com/watch?v=akQSZ071f2k&t=1221s) he showed this cooker he had.
So I was intrigued enough by this cooker that I contacted the only guy I know in OZ and he put it out on a forum, but no one had knowledge of one. Neil though he might be able to get one knocked up and I thought I would try too.
First I slowed the video down and watched close looking for features and eventually stopped the frame and tried to make drawings and guess dimensions.
Next I bought a couple of sheets of posterboard and made one by rolling it around a traffic cone. That didn't work so good as it came out lopsided but it did confirm that my dimensions were close.
So I went online and researched how to layout a cone, Youtube is amazing! There were several videos if you had computers and printers, but only 1 that I found where the guy showed how to lay one out; https://www.youtube.com/watch?v=MPhCeK8Tn_c&t=559s Very boring talker but I learned! Thanks guy!
Following his advice I made 2 circles, 1 for each end of my cone, 6" and 8" and connected them with the only allthread I had 1/4". I would use something larger next time as the 1/4" flexed and I had to pay close attention when rolling out the pattern.

On each disc in the same location I marked a starting point so I would know 1 revolution. Then on my kitchen floor I rolled out the pattern first to see if my paper was large enough. Then I marked the start location on the paper and drew a line between the 2 marks. This would be 1 edge of the cone.


Up next I rolled out the pattern pressing on the paper to get an indentation (this is when I found the 1/4" rod too flexible) once at the end of the revolution I again marked the end point on the paper and drew a connecting line. And proceeded to fill in the 2 arc lines.


Added some legs;

Soon I had this cut out;

Since this was a template I didn't evenly space the legs. I rolled it up and taped it together for a gander;

I added a 2" chimney section and cross bars for support of the billy, made a 6" circle for the top plate with antiwarp bars and a hinge. You can see the 2 disc roller thingy sitting in it to give it shape and support.

Now comes the hard part. What will it cost to get 1 made? I took my template to my welder Darin. He figured something like 3 hours at $75 an hour.....so $225......not something I wanted that bad.....
That night I went to bed and was thinking how could I do it less expensively.....Maybe I could buy a premade cone online! After all I LIKE doing this kind of stuff! Maybe I could do everything except the rolling of the sheet metal.... Got up the next day and checked online for cones.....called one place, no-one answered. Gave up on that idea.
Took my template down to the local plumbing place that does sheetmetal work. Talked with Chris at Geo. Wilson plumbing. For about $36 worth of materials and $36 for rolling up I could make 2 cookers!
I bought 2pc of 14ga steel, it has to be 22 x 28" to make a complete cooker, includes lid and chimney.
Once home I "stretched" the template on the steel, of which I had clamped both pieces together so I only had to cut once.

Man that sun was an issue for about an hour as I cut things out and tried to take pictures... I had decided that I wanted to have curved arcs where the legs connected to the sides for both aesthetics and strength. I started with a center punch and a pilot hole. Done by eye not perfect but it works.

I get carried away some times and forget to take pics for you my loyal reader. Here is the pic showing the hole for the last leg arc.

Boy I really wish I had a plasma cutter! I cut this all out with a coping saw......Bazinga! I used a jigsaw. In the next pic you can see the change of direction hole for the top corner of the cone.

After a bit it was all cut out.

Two of em! I did about an hour of grinding and filing to make the legs more uniform and pretty and remove all the burrs. Then since it was a Friday I wire brushed and coated them with a anti-rust coating by Permatex.


If all goes well Monday they will go down to get rolled.
I took them down this morning and should get them back soon. In the meantime I needed to figure out my 2" chimneys. I almost just asked to see if they had any 2" x 6" circles but I kinda didn't want to push my luck and I wanted to see if I could make them.
14ga is pretty stiff and I doubted my ability to make a nice curve with it. Initially I thought I would just tack weld it on the cone rim and bend it as I went, but I knew if I could at least get it somewhat circular it would go easier.
So I started by cutting to overlong 2" strips from my stock.

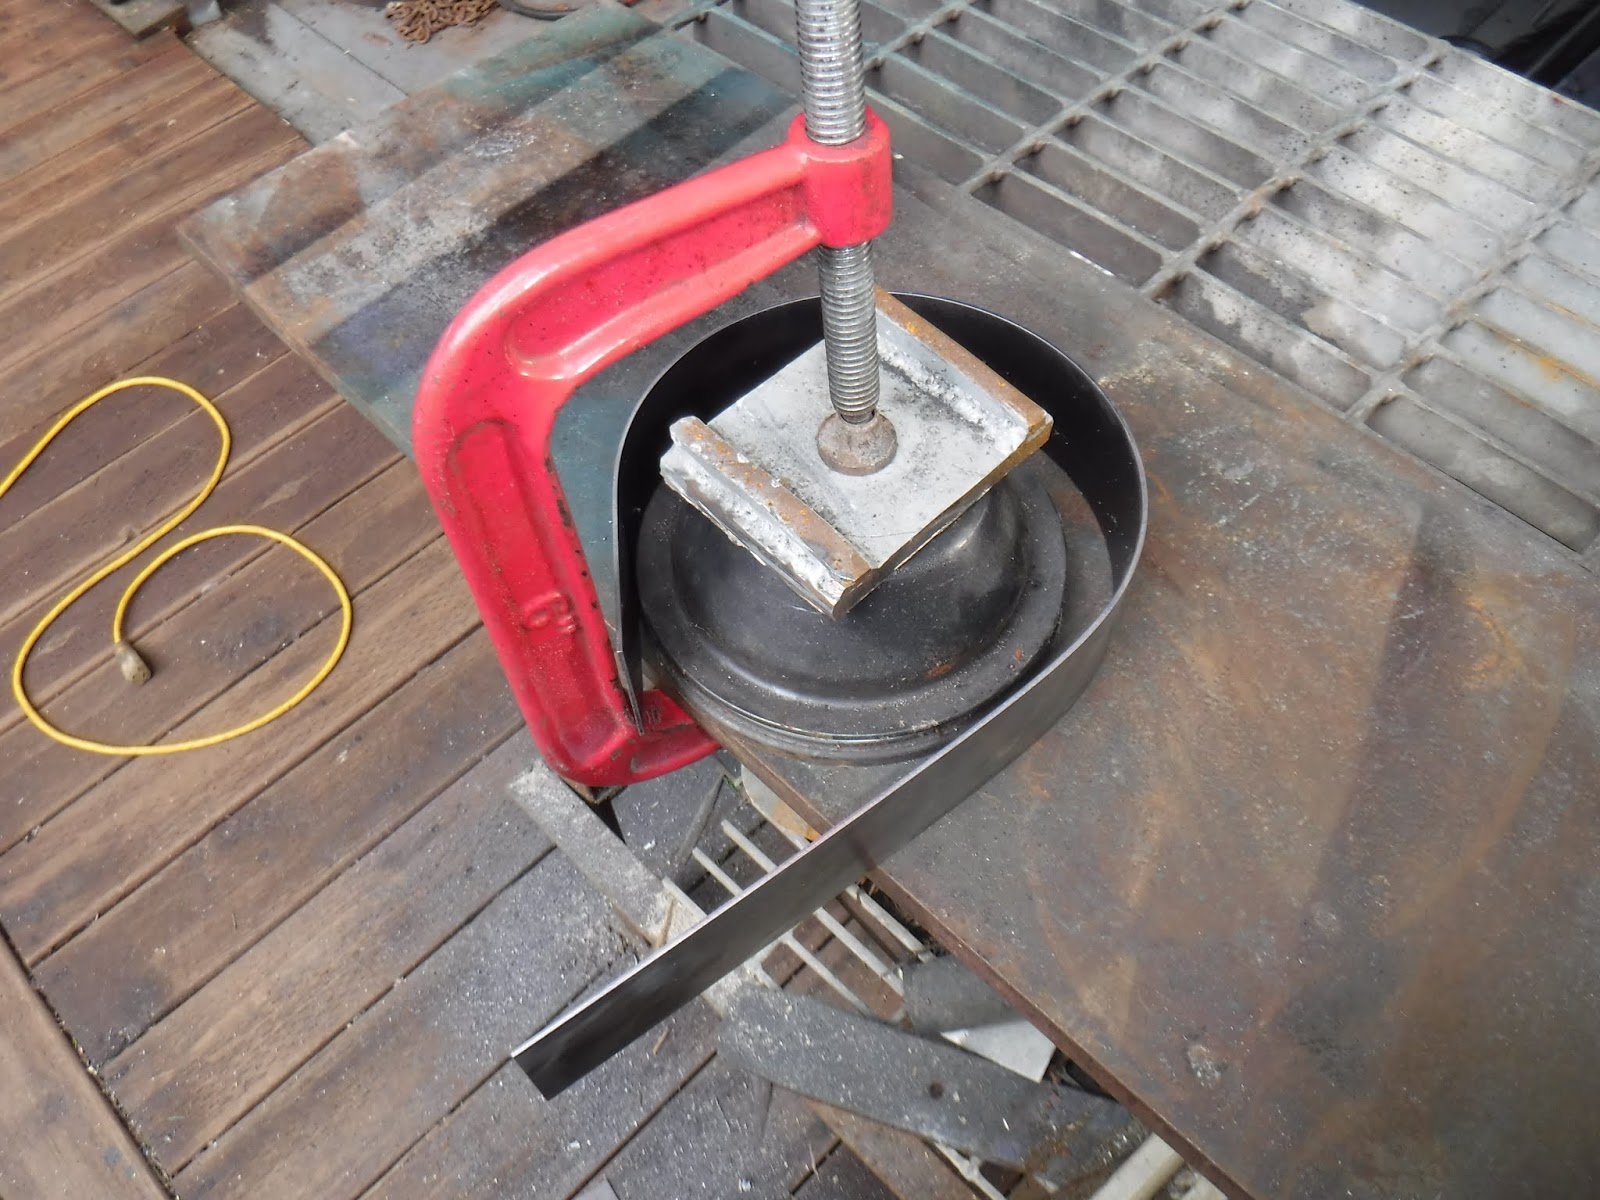
Now I've bent stuff before I just need the right size circle to bend it around. It took me awhile but finally I found something I could work around, the water pump pulley from a 2.25 Rover engine, turns out it is a 5-3/4" diameter! Five would have been better but I don't have anything that size(trust me I looked!).
Clamped it to my work table with a 6" clamp and heavy steel on the top to keep it from bending.

I used the clamp side as a brace for leverage with bending the strip.

Using just my mighty arm and hand strength I pushed the strip around the pulley. To be honest it went easier than I expected.
Getting the ends bent somewhat in shape proved to be a chore. I had to bend one end up out of the way and then round the other end. The short end I used a rubber mallet on.

Eventually I got 2, 7" circles out of it. I know they are about 3-4" too long so when I weld them to the cooker I should be able to cut off the ends.

Now it is Friday night and it's raining. I received my cones back late Thursday and spent a couple of hours working on them. I was hampered a bit by when I picked them up the guy at the counter told me their rolling set up smallest diameter is 8" and mine was 6" and that the guy doing the work did the best he could. So It didn't line up perfect and I had to make some adjustments and use plenty of clamps to pull them into phase.

I welded up the cones and then added a chimney to one of them, thinking I'd rather get one done and see what issues I'd run into. The chimney again took clamps and grinding and cutting and while not beautiful it will work.


It needed a opening for the firebox and I cut one out 2" x 4", I have to still make a door and latch for it.

Next up was to put in a couple of rods to put a cook pot or billy on, I used some 5/16" rod. The coffee cup is for effect.


At the same time I added some tabs for the lid hinge using some 1" x 1/8" stock I have laying around.

Then I put on something I dreamed up that was not on the original I saw. A bail to carry it with! I drilled some 5/16" holes in the chimney and welded in some cut off 5/16" bolts. Then came the hard part; bending 3/16" rod around bolt heads and getting an even hanging bail.


I have some expanded steel to make for the bottom of the firebox but my orbital jigsaw took a dump and I can't cut it or make the lid/door yet.

Now here it is Feb 4 2019 and I have 1 done!
I marked out a circle for the firebox on the expanded steel.

I did it at 8" and then after measuring I folded down about a quarter of an inch all the way around the circumference. This I was able to push in the bottom and clamp it about 3/4" up from the bottom.

And weld into place. Because the expanded steel is so thin it took me a bit to figure a good method. I wound up just going around the edge with the bead and where it came close to the expanded steel I just let it envelope it.

After that I finished welding on the fire door hinge and adjusted the latch to work.

open;

With the cook top open;

Bail up the long distance look! Still needs paint but too cold and wet for that.

Can't wait to try it out!
OK well I went ahead and built a fire in it;

I used my homemade fire starter and 4 sticks of wood. here it is after about 5 min.

Then while it was warm I painted it with silver High Heat Krylon. The next morning I fired it up to see how the paint would hold up and actually boiled some water. The battery died in my camera so not many pics.


I did however manage to make a video of the firing up tests.
Enjoy!
I made the other cooker, but it is a little bit different. I cut tabs to bend down on the lid for alignment and left off a firebox door. As I had other plans!

The rest of it was similar construction, I also left off the expanded steel for the firebox.

I made a better hinge for the lid and this is less floppy.

Here are the 2 of them;

I found a stainless steel skillet at the thrift store that fits my cooker perfectly for an ash catcher!


POOP!! I thought I had been taking pictures of the next phase and nary a one!
I decided to make the next one with a firebox like the Kelly Kettles have, which is a bowl to hold the fire that the cooker sits on. It is stoked by a hole in the side of the bowl or straight down the chimney. First thing I did was cut off the legs on the cooker to leave an 8" base.
Starting with a scrap piece from the cooker metal I cut out an 8" circle and a 3" x 28" strip, a 3/4" strip and a ring that had a 7-3/4" ID and 8-1/4" OD. The circle was laid down and the 3" strip welded to it. I figured that I needed to weld the 3/4" strip to the ring next. I was careful and lined everything up and clamped things for close tolerances and welded and sanded the outsides for looks. Hey, I'll be the first one to say my welds are not pretty. If I had Tig it would be different but my welder is 25 years old and I don't get to do much with it. I was getting better as the job went on!
Here's the firebowl;

Mind you it has been raining and I've been working in my cramped garage clamping things in the vise....I got the ring cleaned up and centered the bowl on it and welded that together. Cleaned the welds and used a flapwheel on my grinder to make nice.
Because it was 45°F and raining I used my torch to heat up the firebowl and cooker and spray with rust preventative. After that dried I reheated and sprayed with High Heat silver paint.
Here is what it finally looks like with the cooker nested on the firebowl for cooking.

The camper aims the hole towards the wind to provide some force into the firebowl.
I made a grill out of expanded steel for the top of the cooker.

It is removable'

While it looked sleek I thought it needed a bail so I made one for it;

By drilling a pilot hole and winding up with a 5/16" hole;


The finished product;
