Wednesday, July 24, 2013

Land Rover air filter

     Well, It's not really Rover, but it is on my Rover. I looked around and found that K&N make a conical filter with a conical airbox. They call it Apollo. http://www.knfilters.com/universal/apollo.htm
    I was hoping that somehow I could combine the KN with the mushroom top for the raised air intake. I found an Apollo on Ebay slightly used in that it was only trial fitted and not used. Once it showed up comparing it with the shroom top it was clear that it would not be an easy fab to combine the 2 systems. So for now I have aborted that idea.  :^( I know it can be done I just do not have the resources.
   So on to the fitting of the KN; the turbo has a 51mm intake the KN a 70mm outlet so an adapter was sourced from HPS  http://www.hps-siliconehoses.com/?gclid=CJC0qK7nyLgCFUFyQgodEiQAtg

At the same time I bought a 90 elbow in 70mm to come off the front of the adapter included in the KN kit. Once that showed up I went to work and took off the foam motorcycle filter and put on the adapter and then the Apollo.

     Then the front adapter was fitted, this necks it down from 102mm to 70mm. Since this is a push on connection it is a concern for watertightness if wading.

     You can also see that the vaccum controls coming off the turbo are not good so later I rerouted them.
     From this point on I really tried hard to figure out how I can do a raised air intake, tastefully anyway. I thought of this and that but nothing was fitting. It became a matter of moving the radiator or the air filter.


     So for now I will keep designing some way to do one in my head and stay out of deep water. I would like to move the intake out of the warm engine bay at a minimum.
     Here's where it is for now;


     You can see the vaccum hoses were switched and rerouted to clear the filter housing.

Wednesday, July 10, 2013

Land Rover exhaust..again

     So I strained my back a couple of weeks ago when I put in the floorboards. It has slowed me down somewhat. Slowly getting better and can do some things every now and then.
     I did some online searching and found out that pretty much all the 4cyl diesels from Rover use the same manifold gasket. Since I had a spare from my 2.25 diesel I went out today to put it on.
     Much to my surprise I found my brake reservior leaking.$%^&* It never ends???? It's brand new!!!! So I emailed where I bought it in the UK, we'll see what happens.

     I took off the intake and exhaust manifolds but kept the turbo in place. The nuts and threads look really rusty on it, so I didn't want to bust anything. It looks like someone's been there before as the rear bottom stud was replaced by a piece of cut off allthread. I didn't have a stud for it either so I put a bolt in.
Here is a pic of the old gasket, interestingly where the soot is you can see right thru the gasket in little holes.


You can see in the photos that #1 and #4 were both leaking putting soot all over the intake manifold.  I cleaned up the intake manifold, removing all the soot and corrosion. I wire brushed the head clean and prepped it for the new gasket.
   
     So since I have the same fiber gasket I thought I'd try something different to make it last. I checked my antisieze and it is rated to 1600F. So I put a light smear on both sides before installation. I also put antisieze on the stud ends.

     Then the intake manifold was put on. It has to go on first because there are 2 hidden bolts holding it to the head.

     Then my attention was turned to the exhaust manifold. Close inspection revealed that there was rust/exhaust gas pitting on the mating surface of the manifold tubes. These I cleaned up with my palm sander and 80 grit sandpaper. Then it could go back on.

    By now the 1 hour job had gotten on to 2 and a half hours. I kept having to take stuff off and make things loose to get the manifods off. Hoses, oil pipes, exhaust down pipe. The exhaust down pipe had to be disconnected from the engine clamp, loosened at the first joint then pushed down out of the way. Plus it was getting hot!
    I removed my sweatshirt, my teeshirt was drenched with sweat already and soon the sun would hit where I was toiling..........
    As fast as I could I started to put on the exhaust manifold, it was almost impossible to get the oil return line hooked back up. I finally had to remove it from the bottom pipe and put it on the top pipe so it would go on. The nuts behind the turbo have to be fitted next because you can't get to them when all is flush againt the head. But it is always the last nut/bolt that gives ya the most problem.
    There is a center nut between the 2 manifolds that you can't see or feel. I tried several ways to get &*$# nut and washer on. Finally I got the washer on with a small pickup magnet. I thought I then had the nut on with a deep socket and an extension. When I went to put the rachet on I heard the nut fall off. I looked for 10 minutes couldn't find it.............and of course didn't have another, oh, they are M8x1.25 by the way.
     Now the sun is on me, I'm frelling filthy and sweating profusely my back is starting to tighten up and hurt again. So I just put all the tools away and close up shop. Went inside and cleaned myself up and had some lunch. Rested my back for a bit, changed clothes and went into town for some nuts.
    By the time I returned it was still too hot and my back needed resting so I just relaxed inside. (did laundry actually)
    Around 7pm I went back out and finished the job, the nut went right on??? I thrashed around in the dirt again working the down pipe back on and tightening bits up meanwhile the brake fluid continued to drip in my face. I don't have a photo of the finished job, I'll try to remember tomorrow. But I did run it and it was much quieter.
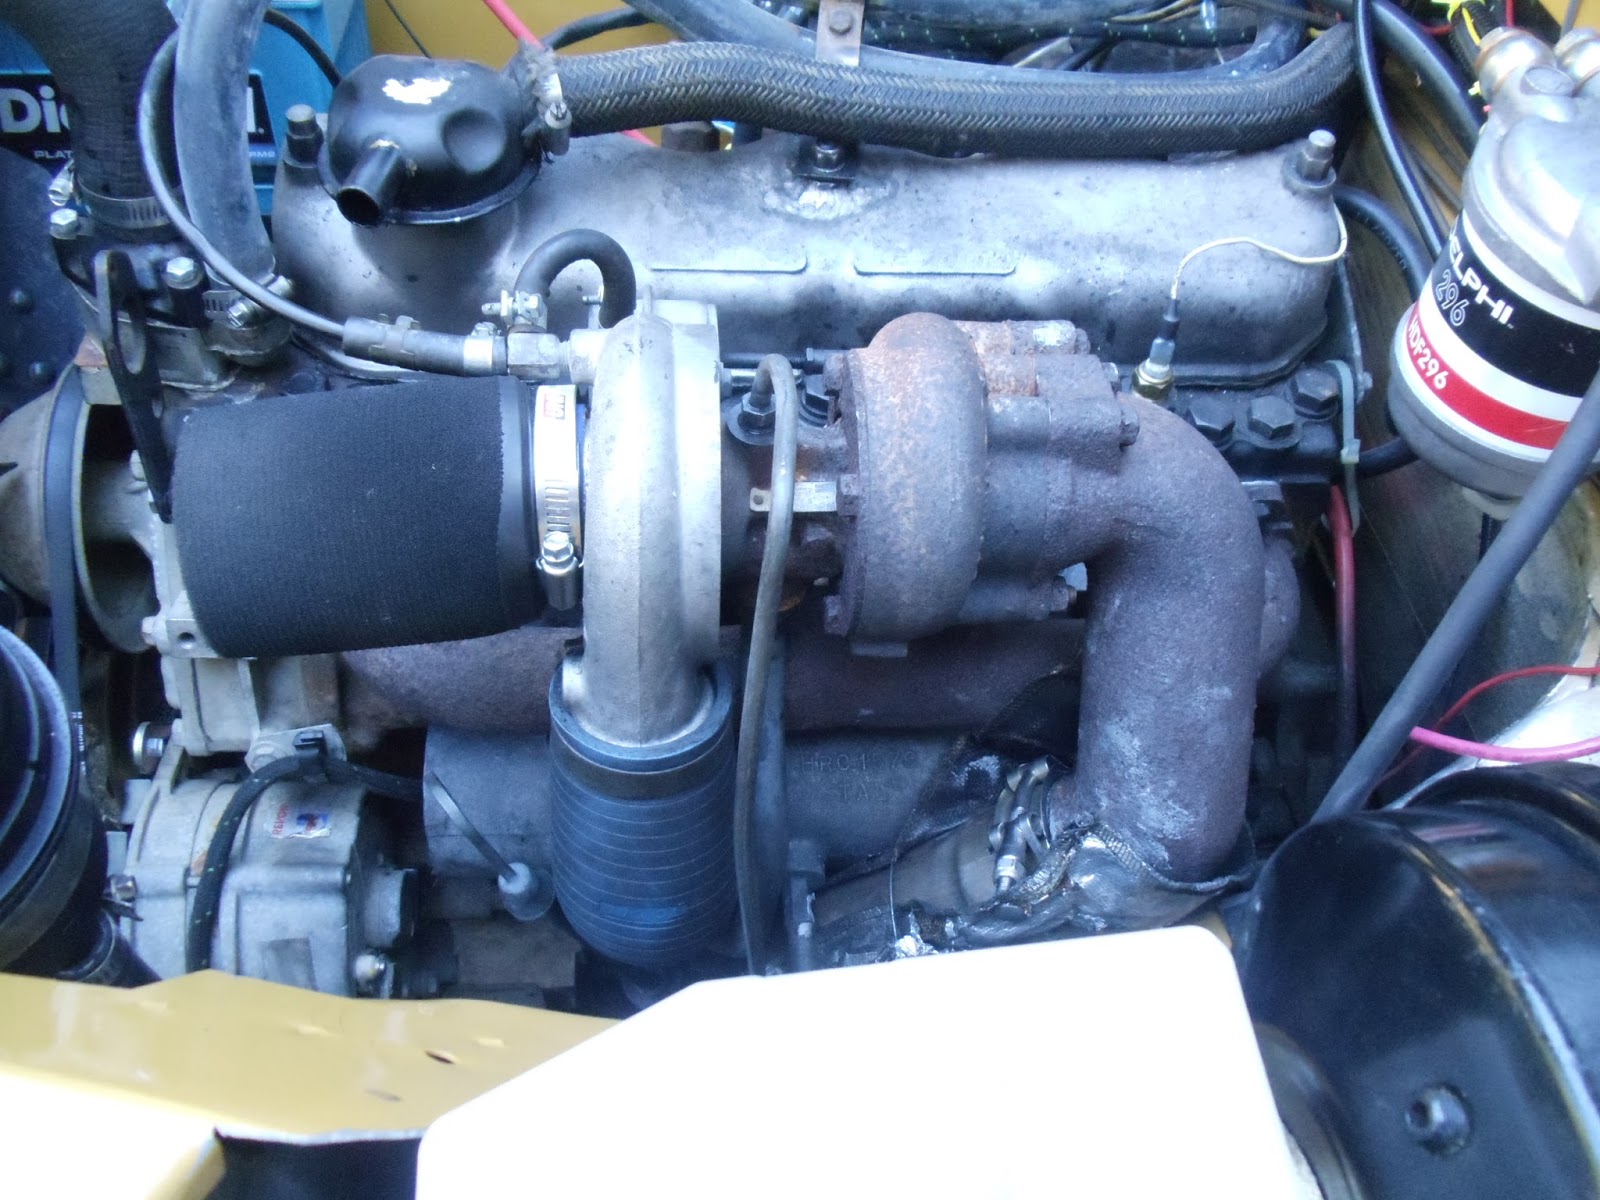
     So here is the photo from this morning of the completed job. You'll notice I still need to figure out the air filter.

    And some good news! I recieved an email this morning LRSeries is going to replace the defective brake master cylinder. Bully for them to stand behind what they sell!

Saturday, July 6, 2013

Land Rover 109 runs...sort of

OK, so I put on the door cards after the lock barrels came in. I now have all 3 doors keyed alike.
     I used wood clamps to hold the card to the door while I drilled holes and put in screws.
     The spare tyre was set in place on the inside tray. It is not the same width as the road tyres but the same height so it can get me out to where I might be able to fix the flat.


     I actually have driven it about 100 miles now. There were some things I had wrong. You heard about the brake calipers already, and the charge lite. Now after driving it and being confirmed by a friend, the power steering wasn't working.
     So back online looking for pics and routing diagrams and a email to Timm Cooper confirmed I had the hoses running incorrectly. Again a trip to the Hose Shop with the hose ends needed and got the correct ones made up. I came home and in between helping the plumber fix a pipe under my house the offense was put right.
     Haven't driven it yet as I have discovered an exhaust leak somewhere around the manifold.

     On another front I ordered mirror arms for the hinges. I wanted Part # MRC56 but could only find #MRC4583. Supposedly it fit Series 3 hinges.
When they came I knew it was too large compared to the ones on my 88. I also discovered it did not come with the bracket to mount. So those were ordered Part #347704 and 347705, right and left. When those showed up I was exasperated! Yes they would fit the hinge but not the arms....*&*&^%$%$  So email Mark at Craddocks went back and forth then pictures. Oh the style I have thru bolt the later style style Series 3 hinges. The MRC56 arms are no longer made. There is no bracket adapting the MRC4583 to the Series 2/2a hinge.
     So I searched the web.............nothing. Couldn't find any MRC56's or adapting brackets..................
    Soooo I made my own! Using 14ga sheet metal I cut out 2 pieces, 3.5x2.5". Marking a 1' line I used that for the hinge side. Then inserted in my vise and bent it with heat at a 90 degree. This 90 I set on top of a piece of 1/2" tubing and bent it again in the opposite direction creating a kinda Z shape. Then drilled for the hinge holes and the mirror arm holes---both different. Painted, dried and mounted. Mounting was a pain in the a** having to readjust the doors.
     Anywho here's the pics;


 Now I'm going to try to load a video of the first test drive. The one I found out the brakes weren't working good on.
 
Wow it worked!
 
So here is a pic of the front of the 109 with all the mirrors on.