Gosh, Where to start?......... The door latches and locks came in last week but they only sent me a 2 lock set keyed alike. I'd asked for 3. Not worth sending back so I re-ordered.
Mean time whilst waiting I went ahead and fitted the latches. The rear door was easy and the LH not too bad but the RH was quite abit of trouble. Mostly the drilling of the hole for the lock to poke thru the door skin. Really tough to center up properly. The hole is a 15/16" so I obtained a 7/8" hole saw and using my dremel tool sanded out the hole to fit the lock seal. The front doors are a ugly fit with the lock not centering once the latch was installed and fitted to the striker plate.
I also fitted the Iron Goat www.IG4x4.com door cards. I haven't put them on yet thinking I might have to take them off when I put on the locks. It took some fettling around the hinge bolts and the door limiter. I took care of this with my dremel tool. The holes for the hinge bolts I used my wood boring bits in my drill press to remove the preformed indentations.
Here the LH card is fitted and below you can see the difference between the new and fitted cards.
Above the RH card is fitted. It must have been a door made on a Friday! nothing lined up on it! I kept having to oval out the holes to fit the hinge bolts. The latch won't just slide on, I had to oval the holes to make it fit the striker.
The 8274 Warn winch needed some wiring so after some research A couple of lengths of #2 wire 36" long and eye terminals were purchased from my FLAPS, Boulder Creek Auto. I took this home and had to figure out a way to make a good crimp as my crimping tool wasn't large enough to do the job. So using the v cuts in my vise to hold small round objects, the wire and terminals were inserted. Behind them I put a 1/4" rod and smashed the heck out of them with the vise. Worked like Robert being my relative ;^)
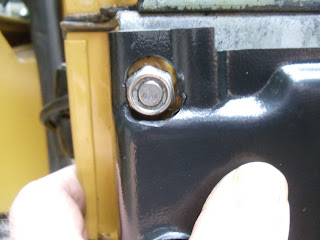
The bottom seatbelt brackets came the other day so those were installed. I used 1/4-28 stainless bolts. Fittment is pretty straightforward. Put in 2 of the bolts to hold the bracket in place and then drill the third hole and bolt it up. Series of pics show the process;
I went out a couple of days ago to start up the motor. I hadn't left the battery connected until after I had the first test drive. So now the battery was low, not enough to start up. I put it on the charger and it took a day to recharge. The next morning I went out with my multimeter and a test lamp to find the draw. By taking off the winch cables I eliminated that. Then using the amp part of the meter I removed the (+) positive terminal and measured the amps going from the + terminal on the battery to the + cable. I had a 44 amp draw. Next I began removing leads from the fusebox and leaving them off until the draw went away.
Thru this elimination process I found it was one of 2 green wires coming from the fuse box. Since they went into the bulkhead and were behind the dash I had to pull the dash apart(AGAIN!). This made easier by a cordless screwdriver ;^) Of course the green wire went behind my auxillary dash.........so off it came. The wire traced back to the water temp guage and the transmitter coming from the head. I had spliced it into a "always on" green wire leading to the wiper circuit. I switched the splice to a white wire connected to the keyed on circuit for the voltmeter.
Another check at the + end of the battery showed no draw.!!! I did something right!


No comments:
Post a Comment