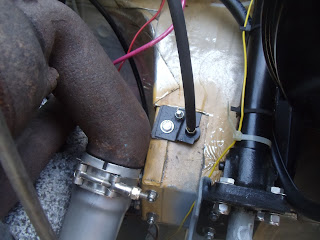
Ok, so I set about making a combination seal and clamp for the top of the footwell at the throttle cable. I measured and cut a piece of galvanized sheet metal I had lying about. I drilled a 9/16" hole at one end and ground out the end so I had a U shape hole. Then using my vise I bent the metal into a Z shape. Next up was to drill holes to hold it to the bulkhead. I couldn't reach around and hold it in place and mark it at the same time. I waited a few minutes and no one came by so I went to my neighbors house and Shelly came over and held it inplace whist I marked the hole locations.
Next I drilled the holes to 9/32" as I would be using 1/4" cap screws. Then there was the test fit. Wow, something fit the first time for once! So I then sprayed it with truck bed liner to seal the edges and let it dry overnight.
Today, I put on the throttle clamp. It was difficult getting the bolts on by ones self but I conquered the problem. Then I set about making a cover plate for the old acclerator linkage. Once again measuring and cutting the sheet metal. This time I could use the old bracketry for the correct hole position. If only I'd used the correct bracket.....second times the charm. Once it was test fit I sprayed it with High-temp paint as it is too close to the exhaust down pipe. Once dry I put it on, Man, I wish I had smaller hands. I had to resort to vise grips to hold the cap screw on the inside while I turned the nut on the engine side. But hey, it's on!
The heat shield was put on next, the new exhaust is larger and it wouldn't snap together so I wired it on. Hopefully it helps. I know the exhaust is just going to cook that corner of the footwell though...............
Here are a couple of pics of the finished accelerator pedal cable attachment. This did not last but around 5 months, then the small all thread broke below the clevis. See my later post on accelerator fix.
By now I'm thinking that I have the left side of the engine bay all sorted out. So it was time to fit the wing. Dragging it from it's resting place on my back porch I set about getting the tools ready and putting antisieze on the bolts. It went on easy enough after all my fitting earlier this year. The front was fitted to the radiator support panel and the rear hung from the bulkhead bolts. Then it was a matter of tightening everything up in the hot sun. Since I had made the removable bit in the wingtop it made it really easy to get to the top bolt.
I still need to put in the mudguard and steering box splash guard to finish off that one side.
At this point I decided to mount the reservoir for the power steering box. Using a piece of stainless "Band-it" strapping I fashioned a clamp and attached the res to the wing using 1/4-20 riv-nuts. Now I can get some hose and hook that up.
Monday I took some old windscreen wiper arms down and had them media blasted. Over the last couple of days I put many coats of primer and paint on them. Then installed them on the 109. Now to get new rubber for them.....


No comments:
Post a Comment