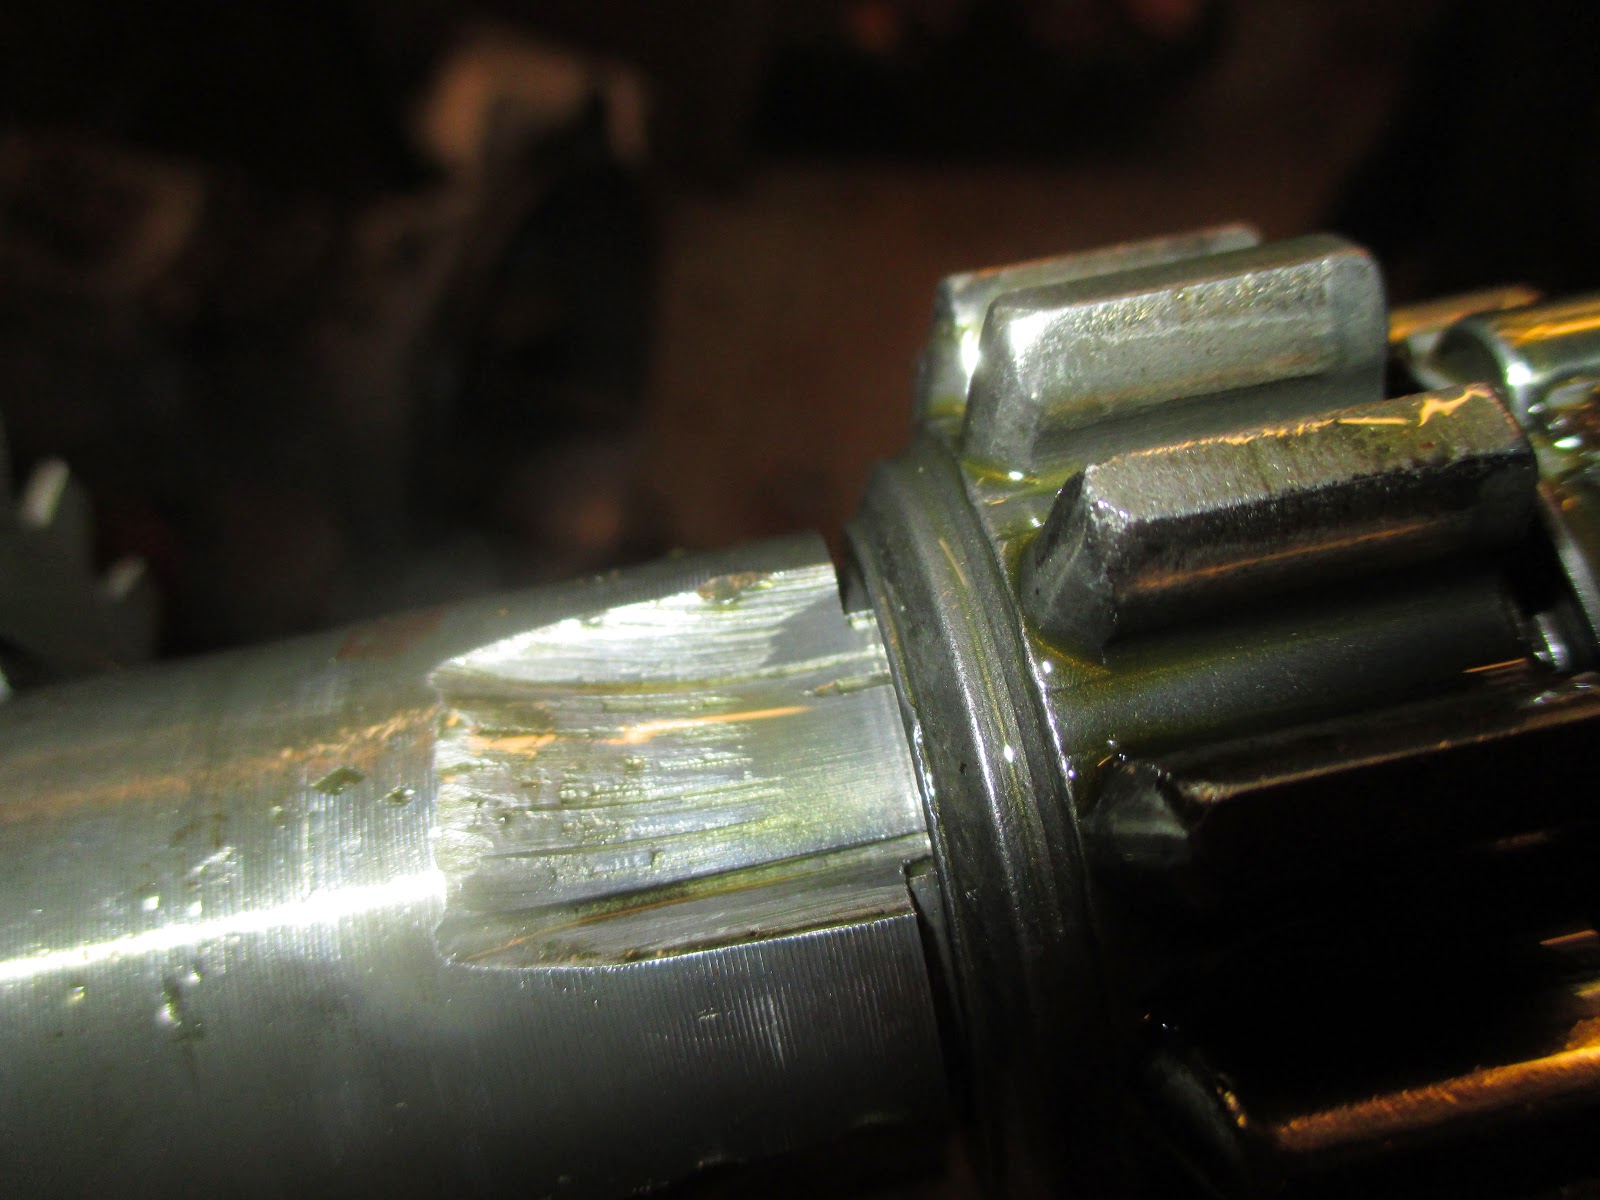
I had taken my new layshaft and gearbox housing to Andy's Auto Supply and had the 1st speed layshaft gear, rear layshaft bearing pressed on to the layshaft and the rear layshaft bearing race pressed into the case, $20.
To begin with it was a struggle to get together. I started out in my unheated garage in the cold December weather, it is more like a big shed than a garage as you could fit a VW bug or a Mini in it IF it was MT.
I had a 12x1 board across a couple of sawhorses with a hole cut in it to fit the rear of the mainshaft which protrudes thru the case. This way (as recommended in the manual) you can stand the case up and drop the various bits into place. This I did, then it hit me that because I was using some old gears in good condition that I was probably mismatching them and would have to take it all apart. This precipitated a vast search in my manuals and parts books, various websites in the US and UK for the differences between the suffix B and C gearboxes. On some I could count teeth in photos and on others the descriptions gave answers.
Here is what I found; the "C" 1st speed layshaft gear is 14t, the 1st speed mainshaft gear is 30t. These have to match the reverse wheel assembly which in suffix "C" is a 16-19t part #561960
So I had to tear the box apart and count teeth to make sure I had a matching set, which amazingly I did! I was sure with my luck I was going to have the layshaft gear removed and replaced........
I struggled to get the layshaft and mainshaft to drop into place with lots of lifting and turning and putting on the bellhousing and taking it off for around 3 hours until my back said I needed to stop or face a relapse. What I did find was that my mainshaft needed to be a drive fit into the rear mainbearing as it wasn't letting the bell housing drop all the way on. With much finagaling I was able to put the layshaft and mainshaft in, in both vertical and horizontal( I was getting tired and frustrated with it) positions. Brian, it's easy once you've done it a dozen times! Sheesh! I did quite a bit of pounding with my deablow hammer to get the mainshaft all the way on.
The next day I moved everything into my warmer house.
Out of my cold garage I made a new paper gasket for the bellhousing-mainbox as I had torn the one I made the day before. Using some posterboard and a machinist hammer I cut out a rectangle the size needed and located the studs on the paper.
Once these were located I used a hole punch to fine tune the holes, the studs would help to keep the paper in place whilst making the gasket shape.
Next the hole had to be made for the layshaft relief as it protruded above the sealing surface.
And the holes for the bolts located.
Then with light tapping with the ball end I worked my way around the inside and outside of the case forming a new gasket.
In my lap in the dining room, tap, tap, tap........next up was to fit the pesky belhousing.
The constant gear and distance piece need to be offered up to the primary pinion and then dropped in place on the layshaft and aligned with the mainshaft and the studs on the case all at the same time with only 2 hands. All this while not disturbing the now greased up paper gasket seal.
I couldn't do this at the dining room table, it needed the hole cut out in the board set up in the garage. So back out into the cold, where with all my new learned knowledge I got the darn bellhousing on!
I then put in the shifting levers and closed that all up.
Wednesday, January 7, 2015
Friday, December 26, 2014
Layshaft woes
I ordered some bits for my gearbox a NOS layshaft(#528703) and a rear layshaft bearing(#RTC1412). These are for the Suffix C box. These from RDS and a syncro for 3-4 (#FRC1758) among other stuff from Rovah Farm. I ordered the syncro for a couple of reasons, mainly I couldn't tell if mine was badly worn or not, having never seen a new one, all I knew was, that it broke a spring and all 3 would need replacing, might as well start fresh. Turns out the brass part of the syncro shows little wear, now I have a spare.......
When the layshaft showed up I set about cleaning up the cosomoline only to find several dings in the splines and end with some small rust spots on the race surface.
After the weekend I spoke with George at RDS and I decided to clean it up with a jewlers file and some 1500 sand paper, I also ordered a distance piece(#502482) for the mainshaft rear which the oil flinger sits on. An hour or so filing and sanding and a few seconds on the wire wheel and the gear would slide on and off like the dings weren't there. Must have been breaktime at the factory and it just got tossed in the pile with the other bits.............
When the layshaft showed up I set about cleaning up the cosomoline only to find several dings in the splines and end with some small rust spots on the race surface.
After the weekend I spoke with George at RDS and I decided to clean it up with a jewlers file and some 1500 sand paper, I also ordered a distance piece(#502482) for the mainshaft rear which the oil flinger sits on. An hour or so filing and sanding and a few seconds on the wire wheel and the gear would slide on and off like the dings weren't there. Must have been breaktime at the factory and it just got tossed in the pile with the other bits.............
Land Rover diff damage, layshaft removal
I went ahead and cleaned up the diff pinion carrier thinking I might be able to slavage the diff with just a new crown wheel and pinion. I removed all the side gears and pins and then when wiping the carrier down I found a crack in the side.
You can also see what apears to be some type of hammering effect on the hole, I don't know what would have caused this, perhaps a previous owner.
The next day I removed the bell housing and the layshaft from the mainbox. This box has holes in the rear of the case to punch out the rear layshaft bearing race. The last box I worked on we had to hydraulic out the race.
While doing the work I decided to replace the PO's bent Hi-Lo(red knob) lever, It should be straight from the swivel ball up;
When doing that I found the pivot bracket for the lever had been broken and repaired and was also bent.
You can also see what apears to be some type of hammering effect on the hole, I don't know what would have caused this, perhaps a previous owner.
The next day I removed the bell housing and the layshaft from the mainbox. This box has holes in the rear of the case to punch out the rear layshaft bearing race. The last box I worked on we had to hydraulic out the race.
While doing the work I decided to replace the PO's bent Hi-Lo(red knob) lever, It should be straight from the swivel ball up;
When doing that I found the pivot bracket for the lever had been broken and repaired and was also bent.
Tuesday, December 16, 2014
progress on the Land Rover
Finally!!! I got to the chiropractor the week after Thanksgiving on Monday. While I was there it didn't seem to do much good and when I went out and got into my car it took 2 min to stop hurting enough to close my door and drive home. I was in bad shape.... I sat down and iced it for an hour then did nothing for the next couple of days except ice and rest and it really improved by Wed I could put my pants on without pain. I couldn't stand or sit up straight for very long and it took another week of resting w/ice to end the pain and just have a tight back.
So on Dec 13 I decided that since it wasn't going to be raining I would start taking things apart. The first thing I did was start the 109 and put it in gear to confirm diagnoses, sure enough there was grumbling coming from the box but oddly I could still go thru the gears. I removed the seats and got a call from friend Brett G. who decided to come over and help.
With Brett's help out came the floorboards, seatbase, tunnel cover, Roamerdrive, we unbolted the transfer case from the mainbox and took it in the garage(such as it is) then undid the clutch slave and the bellhousing and pulled the mainbox out to said garage.
Because Brett had recently done a couple of other gearbox repairs we dug into the main box. At first there was nothing obviously wrong other than the missing syncro spring. Nothing to explain the loud clunking noise while driving. We took the gearbox apart and laid it all out.
What we found didn't add up to the noise and lack of drive. Below you can see a damaged race for the rear layshaft bearing, in the next pic the gear is not fully seated on the layshaft.
At the end of all this work we knew it must be something else. Someone(Mark) on a forum(GnR) had suggested it was the diff, but due to the noise coming from the gearbox I had discounted his response, Sorry man. So Brett pulled out the floor jack and jacked up the right rear wheel and tried to turn it, it wouldn't budge....sigh, all that work....
Brett had to go as it was dark and he had a date, while I set about checking out my spare gearbox of unknown condition. I opend it up to find sludge inside so decided to take it apart and check it throughly, surely out of 2 boxes I could get 1 running! Well the simple answer was no. By now it was 930pm and my back was tired and starting to hurt.
I went inside and cooked dinner and sat down with ice on the back and watched a movie. The next morning I got up to find out what was wrong with that wheel, Brett and Linus were due up later(I thought to help, but not so as it turned out).
True to form I couldn't make that wheel budge either, so thinking it could have been wheel bearing or diff I removed the wheel and pulled the inner axle. The hub still would not turn! With deeper investigation I found one of the springs broken on the brake pad and once I removed the pads the hub turned. I think that because of sitting for a month and in the rain it was frozen in place.
So moving to the other side I pulled the wheel and then the inner axle, both axles showed minor wear and came out easily. Then it was on to the diff removal, dumping the oil out and with it came big chunks of metal from teeth........Mark was right.........
Once out I could see that the ring/crown gear had lost teeth, the pinion gear was damaged but intact.
I spent the afternoon disassembeling the diff and with Brett and Linus checking my spare diffs and acessing my options.
As far as the diff goes I think this is the time to go with a locker and I am checking my options, I already have a set of 24 spline axles in the batting circle.
For the mainbox I am going to replace the layshaft and rear layshaft bearing plus the 3-4 syncro, I bought a gearbox seal kit and I might hook up the reverse light.
Oh, and my back well it still hurts after all the work each day but with ice I have been able to knock the pain down to a dull roar and some siatica on my right side, hopefully I can do another chiro and get that settled this week during the rain...
If I don't make back before then, have a happy Holiday!
So on Dec 13 I decided that since it wasn't going to be raining I would start taking things apart. The first thing I did was start the 109 and put it in gear to confirm diagnoses, sure enough there was grumbling coming from the box but oddly I could still go thru the gears. I removed the seats and got a call from friend Brett G. who decided to come over and help.
With Brett's help out came the floorboards, seatbase, tunnel cover, Roamerdrive, we unbolted the transfer case from the mainbox and took it in the garage(such as it is) then undid the clutch slave and the bellhousing and pulled the mainbox out to said garage.
Because Brett had recently done a couple of other gearbox repairs we dug into the main box. At first there was nothing obviously wrong other than the missing syncro spring. Nothing to explain the loud clunking noise while driving. We took the gearbox apart and laid it all out.
What we found didn't add up to the noise and lack of drive. Below you can see a damaged race for the rear layshaft bearing, in the next pic the gear is not fully seated on the layshaft.
At the end of all this work we knew it must be something else. Someone(Mark) on a forum(GnR) had suggested it was the diff, but due to the noise coming from the gearbox I had discounted his response, Sorry man. So Brett pulled out the floor jack and jacked up the right rear wheel and tried to turn it, it wouldn't budge....sigh, all that work....
Brett had to go as it was dark and he had a date, while I set about checking out my spare gearbox of unknown condition. I opend it up to find sludge inside so decided to take it apart and check it throughly, surely out of 2 boxes I could get 1 running! Well the simple answer was no. By now it was 930pm and my back was tired and starting to hurt.
I went inside and cooked dinner and sat down with ice on the back and watched a movie. The next morning I got up to find out what was wrong with that wheel, Brett and Linus were due up later(I thought to help, but not so as it turned out).
True to form I couldn't make that wheel budge either, so thinking it could have been wheel bearing or diff I removed the wheel and pulled the inner axle. The hub still would not turn! With deeper investigation I found one of the springs broken on the brake pad and once I removed the pads the hub turned. I think that because of sitting for a month and in the rain it was frozen in place.
So moving to the other side I pulled the wheel and then the inner axle, both axles showed minor wear and came out easily. Then it was on to the diff removal, dumping the oil out and with it came big chunks of metal from teeth........Mark was right.........
Once out I could see that the ring/crown gear had lost teeth, the pinion gear was damaged but intact.
I spent the afternoon disassembeling the diff and with Brett and Linus checking my spare diffs and acessing my options.
As far as the diff goes I think this is the time to go with a locker and I am checking my options, I already have a set of 24 spline axles in the batting circle.
For the mainbox I am going to replace the layshaft and rear layshaft bearing plus the 3-4 syncro, I bought a gearbox seal kit and I might hook up the reverse light.
Oh, and my back well it still hurts after all the work each day but with ice I have been able to knock the pain down to a dull roar and some siatica on my right side, hopefully I can do another chiro and get that settled this week during the rain...
If I don't make back before then, have a happy Holiday!
Sunday, November 30, 2014
delayed by back injury
I hurt my back a couple of weeks ago and then redid my roof skin to some small avail.... I can't sit long enough at the computer to type up the update but will when I can.
Monday, November 10, 2014
Monday, November 3, 2014
Land Rover windscreen leak, door latch fixed
It finally rained here in California, YAY! I was able to go out during the start of a shower and find the leak causing the puddle on the drivers(left) floor mat. I sat there for a few min and then it started, it was coming out under the retainer for the glass in several places. The worst offender was dripping onto the windscreen holddown and then onto the floor. Even when it was happening the clear water was hard to see.
While it was raining I tried pushing down with a putty knife the sealant on the outside of the glass but it helped not.. So I had to wait a couple of days for the rain to stop and things to dry up some.
Today was the day so looking at the outside seal I could see it was cracked and seemed too small a volume.
In my stuff from long ago I have some seal that was called Duct Seal by the guy who gave it to me. I have had it about 40 years in a bag. It is pliable, sticky, and works great. I set up myself with a hair drier and dried out the outside channel and heated up the duct seal then pressed it in with a putty knife.
Once pressed in I cleaned up the look with the putty knife so it would look better.
It took about a half and hour to work my way across the bottom and fill in the gap. Hope it stays!
The other thing getting done today was ever since I put my doors on the drivers door has needed a huge slamming to get the lock set so I could lock it with the key. I set out to figure out what was going on. I tried adjusting the stiker but nothing was working so I took it off and tried it in the latch. That is when I found that it wasn't fitting correctly but I couldn't see where the "jam" was. So I looked for witness marks, The rubber was hitting the side of the latch so I ground that down, no joy....
Next I started taking measurements to see if the latch and the striker were a good fit. The latch seemed a bit tight so I got out the Dremel tool and smoothed out the lip, that helped a little but enough to let me know that something else was binding.
Something I couldn't see.........Then I found it one of the screws which holds the rubber on the striker was 1/32-1/16" of and inch too long. So I ground it flush with the Dremel and tried the striker in the latch by hand and VIOLA! It worked! Then I reinstalled the striker and it's all good now. Whew!
While it was raining I tried pushing down with a putty knife the sealant on the outside of the glass but it helped not.. So I had to wait a couple of days for the rain to stop and things to dry up some.
Today was the day so looking at the outside seal I could see it was cracked and seemed too small a volume.
In my stuff from long ago I have some seal that was called Duct Seal by the guy who gave it to me. I have had it about 40 years in a bag. It is pliable, sticky, and works great. I set up myself with a hair drier and dried out the outside channel and heated up the duct seal then pressed it in with a putty knife.
Once pressed in I cleaned up the look with the putty knife so it would look better.
It took about a half and hour to work my way across the bottom and fill in the gap. Hope it stays!
The other thing getting done today was ever since I put my doors on the drivers door has needed a huge slamming to get the lock set so I could lock it with the key. I set out to figure out what was going on. I tried adjusting the stiker but nothing was working so I took it off and tried it in the latch. That is when I found that it wasn't fitting correctly but I couldn't see where the "jam" was. So I looked for witness marks, The rubber was hitting the side of the latch so I ground that down, no joy....
Next I started taking measurements to see if the latch and the striker were a good fit. The latch seemed a bit tight so I got out the Dremel tool and smoothed out the lip, that helped a little but enough to let me know that something else was binding.
Something I couldn't see.........Then I found it one of the screws which holds the rubber on the striker was 1/32-1/16" of and inch too long. So I ground it flush with the Dremel and tried the striker in the latch by hand and VIOLA! It worked! Then I reinstalled the striker and it's all good now. Whew!
Subscribe to:
Posts (Atom)