28 July 2020
A miracle happened(well almost) my neighbor gave me his sandblasting outfit, pot and media. I have a compressor so I was a go! It hadn't been used in 10 years. There was a couple of pounds of ground corn cob in it. That got dumped out. I set it all up with high hopes of not having to do all the hand sanding I was looking at. I put in some more corn cob and went to work. It didn't work worth a crap. The corn just kept plugging the nozzle. I dumped that. All this in the sun in the high 80's......Then I tried some aluminum oxide, maybe 3 lbs as that was ll there was. That worked great but had trouble with the pot on a slope and feeding the nozzle. I kept shaking the pot to get flow. It did get the first vent slide inside clean though!!!
29 July 2020
Some of this was in the previous post.
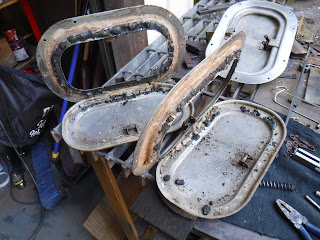
I had pulled one of the vents and taken it apart. Well to be clear I took the latch assembly apart. I drilled off the ends of the 3 semi-tubular rivets, knowing full well I wasn't going to find a direct replacement, let alone find a rivet set that would do them. They needed to be done to clean the rust out to get them functioning. The finger pins are a drive fit and took quite a bit to get the first one out due to the rust build up, I pre-sanded the others prior to removal. The last little bit had to be driven out with a nail set. You can see it in the picture holding the spring assembly together.
The next pic is fully disassembled
And then an hour or so later after lots of hand sanding...
I hadn't figured out how I was going to clean the inside of the slide, none of my tools fit. So I turned my attention to the vent itself.
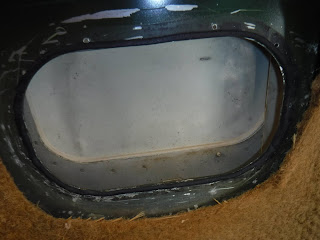
UGGGG!
It took a couple of hours with a stiff putty knife, wire wheel in my pillar drill, propane torch to soften the tar crap and then a boatload of hand sanding to get to this. Couple of hours in the 90°F heat of my shed.
Then I set about painting the bits. The original finish seemed to be a light galvy or Sheradizing and I wasn't sure if my sanding had "broken the skin" so to speak so I painted the vent Almond with Rustoleum 2x paint and primer rattle can. The same brand but flat black for the latch.
I decided to use cotter pins to put it back together.
Note that the pin on the slide takes 2 washers on each side, between the dogbone and the slide.
The cotter pins were a bad decision; they stuck out too far and were too pokey. Yet with no real options yet I put them in. While I still had it out I decided to experiment with some sort of seal on the vent. I'd never seen one yet the PO thought they should have tar in them......
I dug out my press on seal and tried a couple of strips to see if it would close.
It did so I prepared a full circle seal.
I had to remove some of the side and the gripper teeth to seal around the latch.
Alas, my seal wasn't thick enough to seal so I took it off.
30 July 2020
With the paint dry in the morning. It was time to install it. I put 2 strips of 3M strip caulk around the hole.
And using an ice pick to locate the holes the 4 screws were installed.
The latch was cycled to ensure functionablity.
I really, really needed to get that sand blaster working, it would save me days of hand sanding. There were still 3 vents to go....
I took the sandblaster apart, to find the pressure hose from the regulator to the media regulator plugged with corn cob...... Once that was cleaned out Whoa Nellie!


No comments:
Post a Comment