Friday, April 28, 2017

Fuel extension tube install

When I put in my second fuel tank under the drivers seat I did not have an extension tube for it. I have been keeping an eye out for one online but hadn't found one. They make pouring a NATO can in SOooo much easier!

Finally I advertised for one on the GnR forum and Colin replied that there was one in a thread on the Series 2 forum for free. So I quickly chased it down and the Poster, 602 agreed to give it to me and post it up from the UK to the States. Of course I offered to pay the postage.

 I received the tube this week and it is in awesome condition! Many thanks 602!!! My hero! The magazine wrapping paper was a bonus!

The hard part was to figure out how to attach the chain to the bottom of the main tube. My hands are too large to fit down in there and I had no tool to clamp the chain that would be long enough. Then I remembered that they made a double scissoring needle nose pliers that is quite long. I stopped in at my local hardware store and found one with the bent nose. PERFECT! (he said)


This tool was able to reach down the tube and clamp the chain, but it wasn't easy. It took about 10 min to get 'r done. I had to hold the lock hasp out of the way, the flashlight, the chain and the pliers all at once. And not drop any of them down into the tank! I wound up with the flashlight in my mouth, blocking the hasp with the chain in my right hand so I could keep tension on it and turn it so the pliers could grab it, with the pliers in my left hand to do the initial clamping. Whew!

Looking down the tube with the chain held in the fixin loop.


The final result;


I know, but I like them longer to get way out of the way.

Just a grammar note;  I tried to use the word plier but is gets underlined as a misspelling. So I looked it up in my paper dictionary. Comes back as plier, one who plies (a trade).  While the correct spellin I needed was pliers which I took to be plural for a single plier.  Never too old to learn, or most likely in my case to re-learn.

Saturday, April 22, 2017

Trailer hub replaced

Last year, 2K16, while working on my trailer I noticed that it was leaking and when I went to fix it found that it was due to a bolt being siliconed in because the threads were stripped. SPOT!(Stupid Previous Owners Tricks). Let me tell ya this trailer has been thruogh the mill at some point.

My repair at the time was to drill out the stripped hole and retap it to a larger size bolt. I didn't like to do it but, hey it is only a trailer! Still it bugged me........knowing that in order to remove the hub I would need 2 different sockets.

This pic shows the larger bolt circled in red;

So today I set about effecting a better repair by replacing the whole hub/stub axle. Loosened the lug nuts and jacked it up and removed the wheel. Then the drive flange, hub, brake backing plate and stub axle.

Earlier in the week I had prepared the spare hub by cleaning and painting it. Now I had to clean the brake backing plate and I decided to cover the hole for the brake cylinder at the same time. The backing plate was a gooey mess! A thorough cleaning with acetone and a wire wheel got it done, next I snipped out some aluminum sheet to cover the hole and just siliconed it on. Add some rust preventer and some black paint, touch off with a little heat from a propane torch to make everything dry and;

Then is was just a matter of kneeling in the rocky dirt of my drive and bolting all the stuff back on. First though I had to clean off the bolts and find a sixth to replace the 1 oversized one I was replacing. The backing plate and the stub axle get bolted on at the same time. that is when I found out that I didn't make the patch the right size. It was too large and the hub flange wouldn't fit flush. So I took it off and trimmed the patch and stuck it back on. THEN it would bolt on.

Next to go on was the hub taking care to get the bearing tension right and locking the tabs over on the nuts. I had to sort thru some used nuts as these had been removed/installed via the world famous chisel method, necessetating some file work to get them to fit flat and the proper nut wrench. After spending more time cleaning up the gooey brake drum it too was put on.


That left only the drive flange to fit. All the bolts were wire wheeled clean before installation. I put them in more or less hand tight because the hub wanted to rotate if I went harder.


Installed the wheel and hand tightened the lug nut prior to dropping it on the ground. I pulled the jack out and put some weight behind my socket on the lug wrench and tightened the drive flange bolts at the same time.


DONE!
Total time was 4 hours, lots of cleaning................, but I feel better knowing that I fixed a small flaw and I and others won't have to deal with it in the future.

Saturday, April 15, 2017

Pack rack install

I really like the Dormobile's ability to store your gear and cook all on one side(for the most part) of the back of a Landy. Since I want to sleep on the RHD side in my cot that leaves the LHD side for some sort of storage.
I have been contemplating cupboards or shelves or just bolting the pelican case to the roofside to removing the windows and installing one of those cupboard insert thingies. By myself as I am now and likely to be the rest of my life I don't need much storage for clothes and all my camping cooking gear fits nicely in a Pelican 1650 case.

Let's face it all that space along the roof sides is wasted behind the driver. I was thinking of putting in some 1.5" wire mesh with a 2 fold purpose, 1 to stop theft and 2 to be able to attach things to on the inside. You know just cutting and bolting it to the inside drip rail to the tub capping like an inside cage.

I have also been thinking of how to have something to drink while driving and figured that something like a tank or water bladder mounted behind the peoples head along the roof side with a drinking tube extending over the door would allow for sippin  while on those long hwy miles or fourwheeling.

Mulling it over for quite a while I finally came up with these pack rack thingies. Basically a cleat mounted to the inside drip rail for the shoulder straps to hang on and the bottom I just put in a simple wire ring anchor point.

Measuring things out I figured I wanted to start with a 12" long cleat and I found some 7/8" electrical conduit I had kicking around. I wanted something round and largeish as to not damage the pack straps. I marked 6" to get the center and made 2 more marks 1.5" out on either side of that. Then I drilled out 1 side of the tube to fit a 1/2" OD steel tube.

I had to kinda guess at how long to make the 1/2" tube to make the cleat stand off enough from the drip rail. I used 1.5" for my length. It is tight on my pack(1-3/4" would have been better) but good on my Camelback. These tubes I welded into the cleat making sure they were lined up flat and straight with each other.

Once the one side was welded in I then drilled out the other side to 3/8" the size of the ID of the tube. This would give me some bite on the tube and keep the bolt from cutting through it. (I hope!). Inside the 109 I used the 3/8" drill to mark where to drill the holes. I only marked 1 hole and drilled it out to 5/16" the size of the bolts I was going to use, wanting to keep as much of the drip rail as possible. Step drilling out the hole and then installing a bolt allowed me to accurately line up the other hole with the 3/8" bit thru the tube marking the drip rail. This was done for both pack racks. And all bolts were installed, I didn't measure them just grabbed some I had I think they are around 2" x 5/16".

A view from above;


So here is a pic of the packs hanging from the racks before I figured out how to restrain the bottom.


Without the packs;


I needed a day or so to figure out how to restrain the bottoms. I tried bungie but it wasn't tight enough and kinda awkward to do. It also showed me that the straps would have to be tight to keep the packs from slumping down from the rack.

I was going to make some kind of restraining thing for each strap, then I hit upon the idea that I could do 1 restrainer for both straps. So this is what I did;

Having some left over wire ring anchor points I mounted them under the centerline of the racks and marked the holes. Then using the do 1 hole at a time on each bracket method I drilled and bolted one side and then I could accurately drill thru the opposite hole and line up the bracket. Installed with 1/4-28 x 3/4" bolts.


Through these I put those links with the threads, I'm drawing a blank on what they are called. Then I could run both the straps thru and tighten them down. I will probably try spring loaded carbineers at some point.


Next up was to make some sort of clips that I could use to hold the drinking tube. Using some stainless strapping tape I fashioned a couple of clips and we'll see how they work out.


In use;


Monday, March 20, 2017

Fuel injection pump, 200tdi

I know it has been a while since I have posted and to be honest life, well death really, got in the way. I heard last autum that my last brother was dying. Waiting on that event and my lack of extra funds kept my Rover/camping desires down to zed. My brother passed Dec 2 and then there was the wait to find out the services schedule. Waiting on this and knowing I only had the money for 1 trip anywhere kept me from joining my friends at Death Valley over the Holidays. It did give me some real time for soul searching. Turns out they scheduled the services for Jan 2. and the cost to fly there doubled so I couldn't go anyway.

   I have been conserving my cash supply by not driving and cutting my bills so I can afford to eat, yes, really. That combined with a really wet winter has kept me home lots and in Jan, I discovered that my fuel injection pump was leaking from the o-ring on the cover of the advance plunger. Doing my due diligence on the web I found out that I could take the cover off and nothing would fall out and replace the offending o-ring. Ordering 2 new o-rings from Diamond Diesel I set about on my spare FIP to see how it was going to go. Damn they used torx bolts so I had to go buy the right tool. Damn, the bolts were so tight the tool would just cam out. I had to use a vise grips to get one of the bolts out and I decided to replace them with allen head bolts. Of course they are metric....... I got enough to do both pumps plunger covers. I did get the spare cover off and took out the old o-ring and put in the new one. Simples enough I can do the one on the engine now.
    Or so I thought, the bolts on the plunger cover were so hard to get at and 1 of them needed to be removed with vise grips I struggled for about 3 hours to get just the bottom side o-ring replaced. Whew! Then I fired up the engine to check my work, the new o-ring did not leak! Yay! Now it was leaking from somewhere hard to tell. It took awhile but I found out it was the o-ring that seals the head of the pump.

Here is a pic of my spare FIP, the head is the rusty bit on the left and the plunger cover is on the bottom center of the body.


Then it was back to the web and see what the heck was needed to fix this. Was I going to have to pull the pump and send it in? or could I do it myself?

That is when the storm hit that dropped some trees on my neighbors house. I helped him remove them it took us a week of hard work, I was soooo sore! Here's a couple of pics;


Back to the FIP;  Online I found out that the leaking head o-ring is fairly common on the Bosch VE pump. It is a fairly common pump on VW's and other diesels. The Vdub guys have figured out that one can slightly remove the head and cut off the old o-ring and slide a new one on all in place. I watched the video a few times and bought the kit for my pump. Then I practiced on my spare pump!
 Putting it in my vise, I cleaned it up and removed all the torx bolts but 1,

You can see in the upper pic there is a new bolt which comes with the kit. It is 59mm long and when screwed all the way in and the opposite bolt is removed allows the head to come out enough to expose the o-ring.


Then you can cut the old o-ring off and slip the new one on over the injector ports and the head and into the groove. You have to do a little juggling with the bolts but it goes on fine. I used some curved probes to keep the o-ring from stretching too much.


After it was dry outside I decided to try it on the engine pump. The timing pin has to be placed in the timing slot on the pump and that was a learning experience for me. I found out that in order to correctly time the 200 that there is a pin which needs to be installed in the drain for the flywheel housing when #1cyl is a TDC. Only then can the timing pin for the FIP be inserted in the pulley. My issue now became that since my 109 was not designed with the 200TDI in mind that the cross member blocked access to the drain hole in the flywheel cover. Heck I can't even see it......


  So that got me thinking that I was going to have to either pull the engine or cut the cross member to be able to set the timing..... neither of which I wanted to do. I agonized over how to cut the cross member and make it removable because the timing belt should be replaced every 60,000 miles. Lots of thinking and asking on forums and looking at videos online during the rainy Feb.
   Finally the weather dried for a few days and I took the fuel lines and the injector lines off the pump, I put in the timing pin and removed the bolts except 1 on the injector head. Then using the supplied bolt I loosened the last bolt and slid the head back. When the o-ring exposed itself I pulled it up and cut it off. Then I slid the new o-ring carefully over the cleaned head and evenly bolted it back together. Next the fuel lines and injector lines were put on and the engine mount to pump and finally the stop solenoid wire and then the timing pin removed and the cover put back on. The system was bled and I turned over the engine, and turned over the engine. It wouldn't quite catch, but then it caught but only on 1 cylinder. WTF? I could tell by the warm exhaust manifold that only #4 was firing. No matter how much I bled it the results were the same, only #4 would fire. I had fucked up! I went from a leaky pump to one that wouldn't work.

Lucky for me we had more rain and I had more time to check the web. At the time I figured that somehow I had knocked the timing off as nothing else had changed. Now I HAD to figure out how to cut out the cross member and set the flywheel timing.......

During some of the drier days I putzed about in the garage with the spare pump. I figured that if I had to send one it to get fixed it wouldn't matter which one it was. It was about this time that I ran my camera thru the washing machine and that's why I don't have a lot of pics of this job.
Here is a pic of the head coming off my spare. When you take the head off all those springs fall out of place and I hadn't yet watched a video on how to disassemble or reassemble the VE pump.


Not dissuaded I figured that perhaps I had opened the pump on the engine too far and the springs had fallen out of place. This meant that I would have to time the pump and remove it and open it up and put the springs back in position. I spent hours searching the web for an illustrated parts breakdown on the Bosch VE pump #0 460 414 069 for the Land Rover LR # ERR0459. Someone found a diagram but as of yet I have no names for the parts.  I watched several videos from both the manufacturer and various mechanics. Thanks Webslinger!
   Girding my loins I went out on a dry day and I figured out that I didn't need to set the flywheel timing I just needed the timing pin in the injector pump and then lock the injector and pull it out.
injector pin in;

timing on crank pulley set;

injector timing pulley locked;

starting to remove the FIP;

pump is out;

and in the vise;

I opened it up just enough to see if the springs had fallen out of place. Unfortunately I couldn't tell because they fell when I opened it up. So I got them back into place, took me over an hour, and reinstalled it in the engine. When I cranked it over it would not start at all............I bled it, it was getting fuel. I thought maybe the stop solenoid had failed so I searched the web on how to check them. I must have really upset the timing was the only other thing I could think of. While the pump was out I took the opportunity to replace the broken engine mount under it.

 While down there if found a small spring much like what you would see in an ink pen. I wondered how long it had been down in the mud and set it aside. After searching the web I decided to pull the solenoid on my spare and check it and I found that it had a spring inside exactly like the one I had found. So I pulled the solenoid on the engine pump and sure enough it was missing the spring.


A week or so later I pulled the pump again. This time I delved deeper into the innards as I thought perhaps I had not set the fuel plunger metering ring on the govenor pin. This turned out to be true but also exposed something else. The shim between the fuel plunger and the cam disk was broken;
You can see the bits in the center section below;

I was lucky and all the bits were in the center and I was able to remove them with a magnet on a probe. That and I opened up my spare pump and swapped out the damaged fuel plunger, shim and cam disk. I put it all back together using vasoline to hold the springs in position during reassembly.
Made new gaskets for the timing cover;


And reinstalled the pump, bleed the crap out of it...again.... and cranked it over, and cranked it over. Now what? Oh the stop solenoid power wire had fallen off.... Hooked that back up and Vroom!

As a side note this engine has always been stubborn to start. I would turn the key and from in the cab it seemed that the starter would engage for a few moments and then disengage or not engage but spin anyway. Sometimes taking half a dozen or more tries to start. Since fixing the FIP it has started on the first crank w/o glowplugs 6 successive times. This makes me think that perhaps that is why this engine was pulled in the first place.

I am soooo glad it is running!

Thursday, February 2, 2017

A tale to write on a rainy day!

Today it is raining and will be for the next few days. Yesterday I went for a bicycle ride and I wish to convey the experience with you. The writing will probably take longer than the two and a half hour ride!

So here goes;

The cold air scraped across the bits of my face not covered with white beard as I zoomed down the steep hill which is my street and headed for the road below. I slowed at the bottom to make sure there was no traffic before turning right and entering the empty road, there I began to pedal and quickly realized I was in too high a gear and 3 short clicks on the lever found me some resistance at the pedals, so away I went.
 One van passed me on the way to the slip out on the road where I got in the queue and waited for the traffic light to change to green. The glowing red orb went off and the green one lit up and again I was flowing down the street on my magic carpet, the slight downhill run short and cool. Too soon the T in the road was upon me and I had to slow and cross the Highway as there was not another vehicle in sight.
   My desired route took me to the left today and quickly there was the right turn I desired under the leaden sky and covered in gravelly mud from last weeks runoff. Still fresh and cold I went up the lazy incline for a mile crossing the many shallow streams of runoff from a saturated soil. The new grasses were all a bright Irish green yet the deciduous trees still had leaves clinging to the branches. As I moved along I could see the homes and gardens and no longer loved cars among the briers. But this road ends and I must go to the left and ride on a smaller more trafficked Highway.
   Here is where the ribbon of pavement begins to climb, by now I have committed myself to the ride and legs powerfully churn circles as I pick the right gear to keep my cadence up. A few cars pass but the road is strangely empty. I can hear the music of Boulder Creek down in it's bed falling over rock and root on it's way to the San Lorenzo River. As I look down upon it I see the channel some 30 feet below cuttin thru the limestone like a mini Grand Canyon and I wonder what will it look like in a million years........
   By now the constant gentle climb has warmed my body under the bright yellow cycling jacket and woolen jersey but I keep on going as the Sun begins to send it's warming rays dancing between the clouds. All too soon the real climbing begins an I know I must stop to remove the yellow jacket which gives me a sense of security for motorists but the sweating will be too much if I delay.  So off it comes and into my hydration pack amongst the first aid kit and toilet paper.
    By the monastery the road climbs a hairpin curve and ascends to yet another in the cool shade of the mighty redwoods trees dark with the damp from all the rain of late. There duff covers the forest floor to a dull red as the runoff wends it way down to Boulder Creek. Above the second hairpin the pave steepens and the trees have left it open to the sun which has taken this time to shine upon me with all it's midwinter glory. Yet still I climb for another 2 miles..., some 6.5 from my house the old road on the right beckons me.
    The old pavement is faded and patched and potholed and patched as I move away from the highway. Up, I still go up and the trees close back in around me and the sounds of my puffing and the knobs on my tires accompany the few chirps of the birds feeding on the seed laying upon the faces of the small mudslides that once flowed over the road. Here I can make out the zziz, zziz, zziz of one of my disc brakes slightly hitting the brake pad with every rotation. Lodge Road (in my mind) used to be the original way into Big Basin State Park, the pavement is old there and has been spottily maintained for decades. Oh!, but the trees and the climb, the solitude and serenity when I get up to the 1697' elevation at mile 7.8 of my adventure makes all the effort worthwhile as I sit on an old bleached dry log and take in the peacefullness of the dank forest.

   Then after putting on my colorful jacket I speed away down the bumpy old pavement with the suspension again making my ride a magic carpet as I pass stacked cut wood of oak and bay and some redwood, it seems the park has been doing some culling and clearing along the road, perhaps in anticipation of the fire season yet to come. The work has left sticks and debris on the road making for more objects to avoid besides the usual potholes and duff. For three and a half miles the road goes downhill curving along on the side of the hill then dipping down over a bridge, below a fast moving unnamed creek, and quickly up the other side only to resume the fast downhill ride to the Park Headquarters.
    Virtually empty today a few cars and a Chinese family eating lunch out of a cardboard box in front of the store all dressed in what looks like down jackets. The young boy is bored and wanders around the picnic area doing circles to something he can only see in his brain. None of them acknowledge me by eye contact. So I eat my chocolate chip Cliff Bar, remove my jacket again for the climb to come. Since the storms of late have been windy and very wet I checked at the Ranger's office with the petite, pretty, brown haired woman(shades of Charlie Brown!) to see if North Escape Road was passable. She replied that she is not certain and has heard that some trees have come down. I let her know that I intend on going up on the highway and riding down North Escape and will let her know if something untoward is found.
    A quick visit to the potty and I was off!
    Climbing, the road sign states the San Francisco is only 67 miles away this-a-way. There is reddish brown duff everywhere, except on the main part of the freshly paved road and water crosses it in many places as I begin to feel the challenge of my efforts. Climbing, slow but sure I am doing sometimes 6mph and sometimes 4mph as the hill goes up in a Cat 4 climb, I pass the spot I used to stop and rest, back when I couldn't ride all the way to the top without stopping a few times. "Climbing makes you stronger!" I listen for cars behind me, but none come, that is a good thing for I like using the whole road and relish the sights of oak and madrone along the roadside overshadowed by the towering redwood of California's first State Park. Climbing, ever anon it seems and each false summit or curve in the road has to be the last one as my fiery thighs demand. Yet still I climb, up where the sandstone, once uplifted eons ago changes the ecosystem to mesquite and oak and redwoods. Suddenly I see where the road narrows and I know that this is the top. As I swing into the right turn a car comes out the other side of the 1652' high crest some 14.4 miles into my storm beating adventure ride.
    Quickly the earth drops out beneath me and the bike and I plummet down a few hundred feet to the top of North Escape Rd. the Sun has retreated behind the clouds and the temperature and I drop down the shambles of a road. A misshapen, humped, windy road, the top is clean from the duff that pervades the forest, but all to soon it reappears along with windblown branches and clumps of oak leaves rotting in the road. I stop to clear a few branches and continue to flow down the old track. Near the bottom a couple hundred feet above Opal Creek, the road is covered by a backed up culvert and sheets of water pour along the road until it finds release on the far side, beyond that lies a fallen soldier, an oak that could not withstand the pummeling of the wind and rain, it's white trunk cracked and broken blocking the old road. Picking up my steed we crossed the trunk near the base where it had broken, inner wood dark from sap and wet.
    Again I go downhill losing the hard fought altitude I had gained until I came upon an old redwood lying across the road his body so soft peoples had kicked their way thru it and I rode over the soft remains of it's innards. Not much further 2 more redwoods nearly blocked the road, one had broken off and speared the pavement with it's 20" diameter shaft, while it's brother leaned completely across the road from hillside to hillside making a triangular frame of the woods beyond. All too soon I was at the bottom rolling along with Opal Creek between me and the Skyline to the Sea Trail. The temperature must have been 15 degrees lower at the bottom, almost in meditation I was lost in the soft greens, browns and reds of the forest as they vacuumed up the sounds of my breathing, the hum of my tires and the zziz of my rubbing brake. I was happy to have my cycling jacket back on for the descent and the ride back to Park Headquarters.
     Once there I waited for the petite ranger and gave her my report on N. Escape, which she dutifully recorded. While she was away I espied about 5 Japanese men who had ridden their mountain bikes from somewhere. One made eye contact and waved, the rest ignored me(?). I also helped a woman who was patiently waiting for a map and some information about the Waddell Creek portion of the Skyline to the Sea Trail.
     Removing my bright yellow jacket I mentally geared up for the last climb, from Park Headquarters at 1119' to Little Basin at 1511', a 392' climb in 2.68 miles. The real climb though is the last 1.33 miles when you go up 339 feet! I chugged my way to the top as the sky continued to darken in advent of the coming storm and the weeds along the side of the road grasped desperately at me to try to pull me to a stop. Emotions soaring as I made the top I pulled over and re-inserted myself into that bright yellow jacket for the four mile downhill back into town.
\   It is highspeed, fresh paved last autumn and only 2 20mph turns you have to use the brakes on(remember the hairpins on the climb up?). The air whipped at my face and tears formed in my eyes as things went blurry around thirty miles per hour and I topped out at almost 32mph. Not a single car on the road so the whole smooth black ribbon was mine, all MINE! I came to the rolling bottom land that follows Boulder Creek into town as it passes China Grade just floating along in top gear trying to keep the blood flowing and clear the lactic acid buildup out of my legs. Flying past the golf course at 15mph I watched my average speed climb up from 8.6mph to 9 and then to 10.22mph by the time I reached the low spot at the stop sign in town.
   A rolling stop at the sign and I turned left to head home, climbing, slightly, but with the right onto Bear Creek Rd it goes sharply up and gains about 20 feet in 100, that always get me at the end of a ride. Then it climbs some more, not much maybe only another 20 feet in 3/8 of a mile and I use this time to do a cool down. I was tired, too tired to try to climb my hill a 100 ft climb in three tenths of a mile.

I hope you enjoyed reading this as much as I enjoyed the 2 beers after the ride! And it took me an hour less to write than it did to ride......
Now go for a ride!

Saturday, September 17, 2016

Land Rover 88 trailer work continues

In between mountain bike rides( latest video https://www.youtube.com/watch?v=eDmL0b-DndI) and other life stuff I have been working on the trailer.

    As you might remember I cut down an 88 roof to fit the top of the tub.


    What I needed now was to make the interface solid and provide some access from the sides. It took some doing with the plywood adapter I made from some 3/4" marine grade ply. It was large enough to cover the tub so I set about drilling holes through the plywood and the tub galvanizing and screwing it down with flat head allen machine screws . I had to then mark and cut out the inside to the roof internal measurements. Here's a pic of the laying out of the internal cuts. At the corners I predrilled 1" holes and then cut with my skill saw.


A look on the inside with the ply between the tub and roof;


And 1 from the outside;


Now I admit it took me awhile to figure out the roof to tub attachment. At first I thought of some sort of latching clamp. Nothing seemed right due to the complex nature of the tub/capping curve plus the reach over to the roof. So I thunk up something of my own.

    Now my initial thought had been to make some kind of super hinge out of 1/2" tube and 1/2" rod maybe some 9"s long 2 on each side. That might still be a good strong way to go. I realized that I didn't(I hope!) need the longer hinge if I just had something to hold the center tube in place.

   What I did was use some 2" x 1/8" flat stock and that 3/8" tubing and some 3/8 rod I had. With this I cut some 2 1/4" lengths of tubing and welded it onto the end of a 6" piece of the flat stock. These were to be my top part of the hinge.


Then I made some bottom hinge pieces by carefully drilling, cutting and bending some tabs.


During the fitting process I kept the hinges aligned with each other by always keeping the rod inserted in both hinges on the side. I used my dremel to make sure all the hinges functioned the same removing some weld which was interfering..


   Once the 4 hinges were made I needed to put them on the trailer. I figured that I should put the bottoms on and then I could align the top parts to them. So I measured and marked and drilled the top of the tub and put the hinges in with flat head screws so I could set the adapter(plywood) on top.


Then I used my router to relive the bottom of the adapter for the hinge.


Trust me there was lots of taking off and putting back on of the roof and adapter. All done by me!

Once the bottom hinge was sorted out they were installed on the tub and the adapter installed and I set about marking the roof for the hinge position. There was some fumbling around as I searched for the right technique and sequence. I did one side and learned and then I did the other.

    Lining up the hinges and marking the top hinge position on the roof and then installing 1 pop rivet I could get the right angle and depth on the hinge plate. Then with the roof propped up I could drill 2 more holes for pop rivets in a triangle formation to keep alignment.


   So do this for 4 hinges. Keep the hinges aligned and Robert is a relative! I didn't think the pop rivets would be enough so I added a single flat head 5/6" machine screw to each top hinge.


All the pop rivets were removed and the adapter and roof. The hinges were prepped and coated as was the adapter with underbody coating.


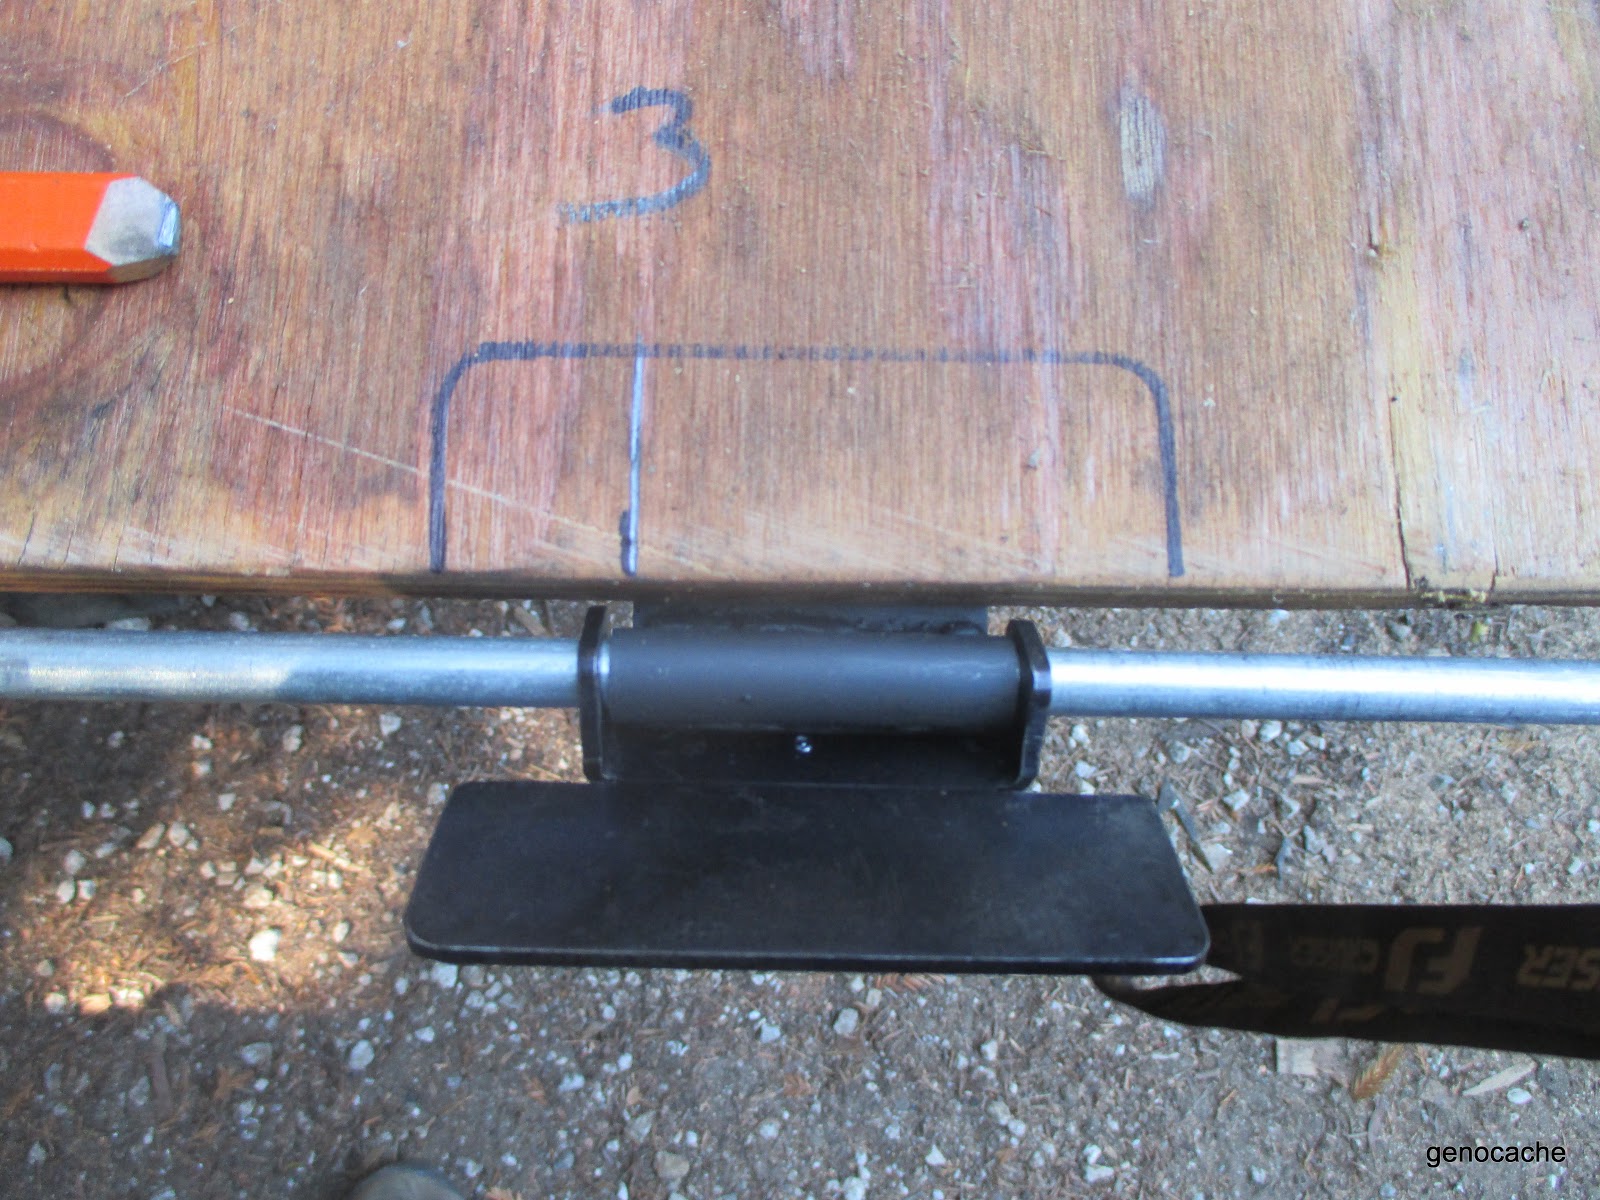
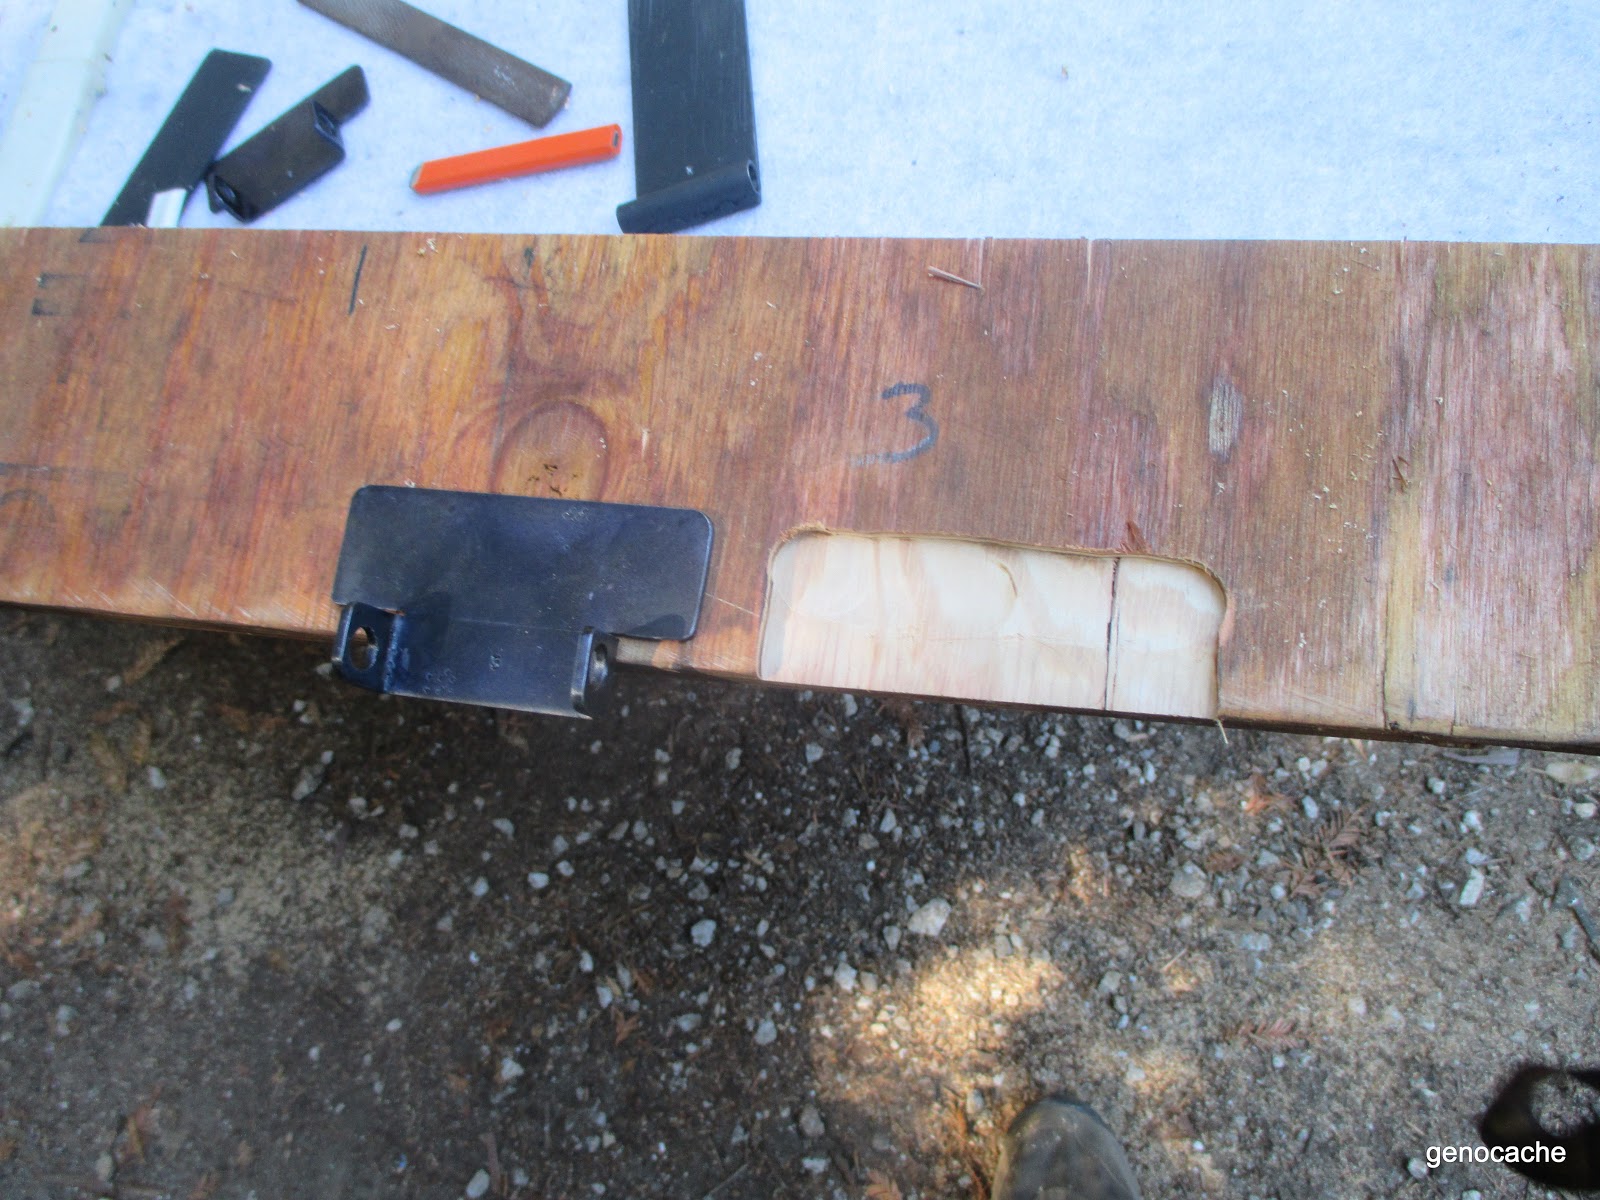
During the process due to subtle differences I kept the hinge pieces marked with notches for their locations. Here is #3;


I made hinge pins which I can pull out;


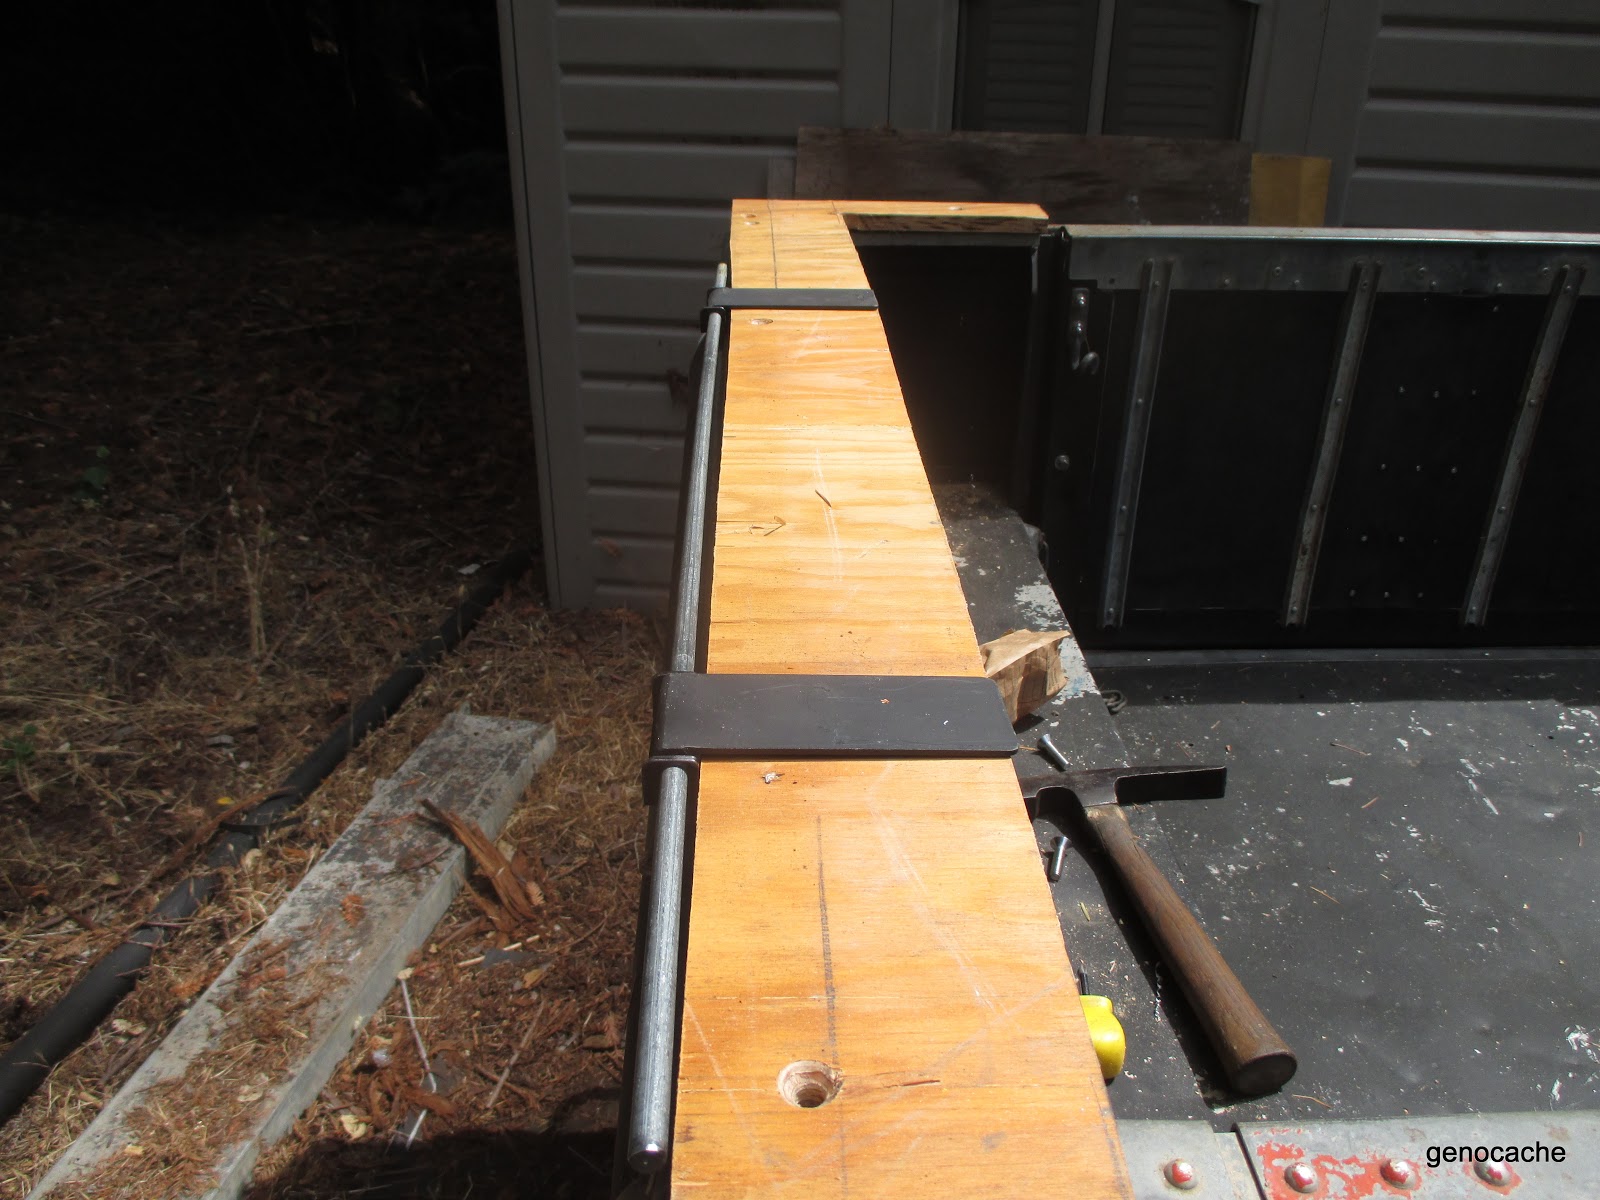
When all was dry I re-installed the lower hinge and adapter.Pop riveted and bolted on the top hinges. Finally got my neighbor to help me put the roof on. Pushed in the pins. They were then drilled for 1/8" hitch pins to keep them from falling out while driving.


Not the greatest of welds I know......

Then I cleaned sand painted the roof using almond color paint.


I have been working on some lift supports but not sure they are the way I'm going to go. They will work for now.