2/18/2023
My speedometer stopped working a week ago. I had a hunch as to what it was, broken inner cable. But why was the question.
To find out I had to open up the dash and test the speedo. Once open I put in a 6" section of old drive cable and connected it to a drill and spun the drill. It didn't turn....that meant the bushing in the drive had bound up.
It took me a couple of days to get ready to do the job mainly due to rain and the 109 being outside. When the day rolled around, I knew exactly what to do since I had taken the original speedo out and unseized it in 2012.
This time I removed the speedo and had to totally take it out of the housing by removing the faceplate. At this point I wanted to check it against my spares to see if the gauge with the trip meter was different from the ones with out a trip meter. What I found was the frames are the same, so the trip meter could be added to any other like model. Not sure how the tire size affects the trip meter so would have to be like for like in that respect unless I find out differently.
Here are some pics of the inner speedo bodies;
Uff Da then came the hard part. Crawling under the 109 I removed the 2 easy to get at bottom screws holding the cable to the speedo drive on the back of the transfer case. I used my prototype valve adjuster tool to stay on the screw. Due to the tight conditions I had to cut the handle off and make it longer to clear the Roamer Drive.
There isn't the right curse word to describe getting the top one out. I'll just say it took me 45 min to remove it, finally by needle nose pliers. And that was easy compared to putting it back on, more on that later.
Finally I had it off and I could see the end of the cable sitting in the drive, barely showing. I know it's a crappy pic, but there it is;
I freaking managed to hook it with an ice pick and get it out. I avoided having to pull the transmission brake!! YAY!!
I tried pulling the inner cable out through the top, but it wouldn't move. That meant 2 things, it was bound up somewhere and I would have to remove the outer cable housing also. I could see the inner where it broke inside the housing.
Then the nightmare began.
I offered the spare up to the drive and put in the 2 easy screws and partially ran the cable to the engine bay. So far so good.
It took me around 2 hours to get the top screw in. I have short stubby fingers and wide palms, I just could not wedge my 2 fingers down there(working from above at this point having pulled the cubby box) with the tiny screw and fit it in the hole let alone try to turn it. I'll not go into the failed methods. What worked for me was pushing a flat screwdriver head(1/4 drive) into a 1/4"id plastic tubing and then fitting the head of the screw into the tube. With the tubing around a foot long I was able to reach around the overdrive with my right hand and with a custom bent bicycle spoke around the screw part of the tubing center the screw with my left hand, and turn it to get it started.
Sorry no pics, I was kinda busy....
Then I finished off with the needle nose pliers to tighten it to spec.
With that done, I washed my mouth out with soap and ran the cable through the bulkhead and hooked up the speedo, reinstalled the dash, reconnected the battery and called it a day.
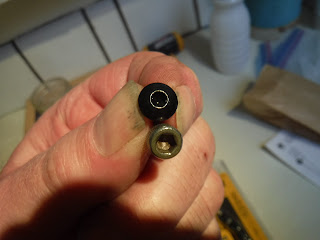
Today I went to the hardware store to get some tools and screws to make a kit for next time. Instead of slotted screws I bought some allen screws in regular and button head. The screws are 10-32 x 3/8". I also picked up a couple of flexible thingies to hopefully help with access, a 1/4 drive universal and a Dewalt wobbly magnetic(!) pivot holder. The 2 types of screws take different size allens so they are also included. Now it's all in a bag waiting to go in my spares case.
During todays drive the speedo was smooth and functional!
The inner drive cable part # 270718 G


No comments:
Post a Comment