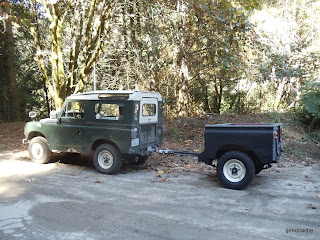
Back to the present; Several years ago I came across another 88 trailer sans the roof and sides so I purchased it. I have done some stuff to it such as filling such holes as I could and painting it flat black. I also beefed up the (to me) wonky tongue to trailer attachment point. Added working lights and a 4 pin wiring connector.
Which brings us to this week and the last camping trip to the Joe Lucas not-a- rally where the roof top tent was a pain in the ass to put up and take down. At least by this old guy. My thought being to transfer the RTT to the trailer. I figured I would need some roof gutters to attach it to and that meant a roof. Right?
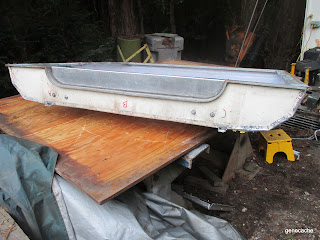
I had an unused 88 roof without the safari roof so I decided to chop it up and shorten it to fit the trailer. Taking measurement I figured around here;
So I marked my distances from the front and scribed a line across the top using a flexible ruler.
Then it was a long process of drilling out spot welds and rivets until the end plate was free.
The stiffening ribs on the roof were particularly time consuming, I used a 3/16" drill on the spot welds making the hole undersized and then used a stiff putty knife to finish breaking the weld. Then the ribs could be removed. I lettered them so I could use them again in the same place so the end plate holes could be reused.
I have always wondered about the rib construction details and in the following pics you can see that there is a support between the sections which needed the welds drilled out all the way through as there is not and easy way to get a putty knife under or to solid rivet them back on. Also note the middle rib does not cover a seam.
In the above pics you can see the old sealant which while still functioning is now hard and brittle. In the last pic you can see how the factory just bent and folded the end to fit the taper on the rib.
Then it was a matter of connecting my scribed lines and making the cut.
I cut through the rain gutter at this point and removed the roof skin from the end plate.
Up next was a test fit and measuring the end plate rain gutter width to determine how much to remove from the side rain gutter.
Because I had already insulated this roof I needed to remove 3/4" of the insulation so I could bend over a lip for the end plate.
Tedious it was to remove!
Somewhere on Youtube I saw a guy bend aluminum by making a tool and bending it slowly a little bit at a time as he went along an edge. I made my tool out of 1/2" round stock with a 3/4" cut, the depth of my lip.
With this I worked my way around the corners slowly folding until I had to cut a vee to allow for the strain relief and proper folding.
Once the corners were done I set the end plate in and clamped it tight as I could into position and then bent the center section into position.
Utilizing the existing holes in the end plate I drilled rivet holes for attachment to the skin. then dismantled the end plate from the skin. Then using The Right Stuff I reassembled it with clamps and pop riveted it all together. This was so it could set overnight and the sealant would dry OK.
On the next morning I went about drilling out the pop rivets and replacing them with solid rivets. I also measured and cut and fiddled and filed and drilled and set with solid rivets the ribs. At the ends I cut off the excess and flattened the ends with judicious use of a hammer..... all was resealed with copious amounts of The Right Stuff, but remember it is only a trailer. Any contents should be weather proofed or unconcerned.
I used the old ribs as a template for locating the holes for the new rib section.
With this all in place I lugged the roof around and welded the rain gutter sections together.
Once my neighbor Bob had helped me make sure the solid rivets were properly set we put it on the trailer for further measurements and to figure out a hinged mounting system.


No comments:
Post a Comment