
To do this I just moved one of the unused roof racks forward and after some experimentation I found a place and decided on a type of mount that I will see if I like enough to paint and keep. It all vibrates a bit when jiggled so I don't know....I've just used some superstrut and bolted it all together. I might weld it all up if I like it. I used the Gamiviti rack clamps; http://gamiviti.com/html/products_roofracks.html
So on to the pics( I know you are dying to see..............)


So after driving with the lites so fitted it was found that they are too loose and the housing vibrated back and onto the roof. As I thought this was going to happen I was ready with a plan!
I made a roof rack to help with the vibration and although not quite finished (still to add plywood) it really stiffened up the front crossbar. It was made again with Superstrut cut and welded to make the roughly square 4x5 shape.

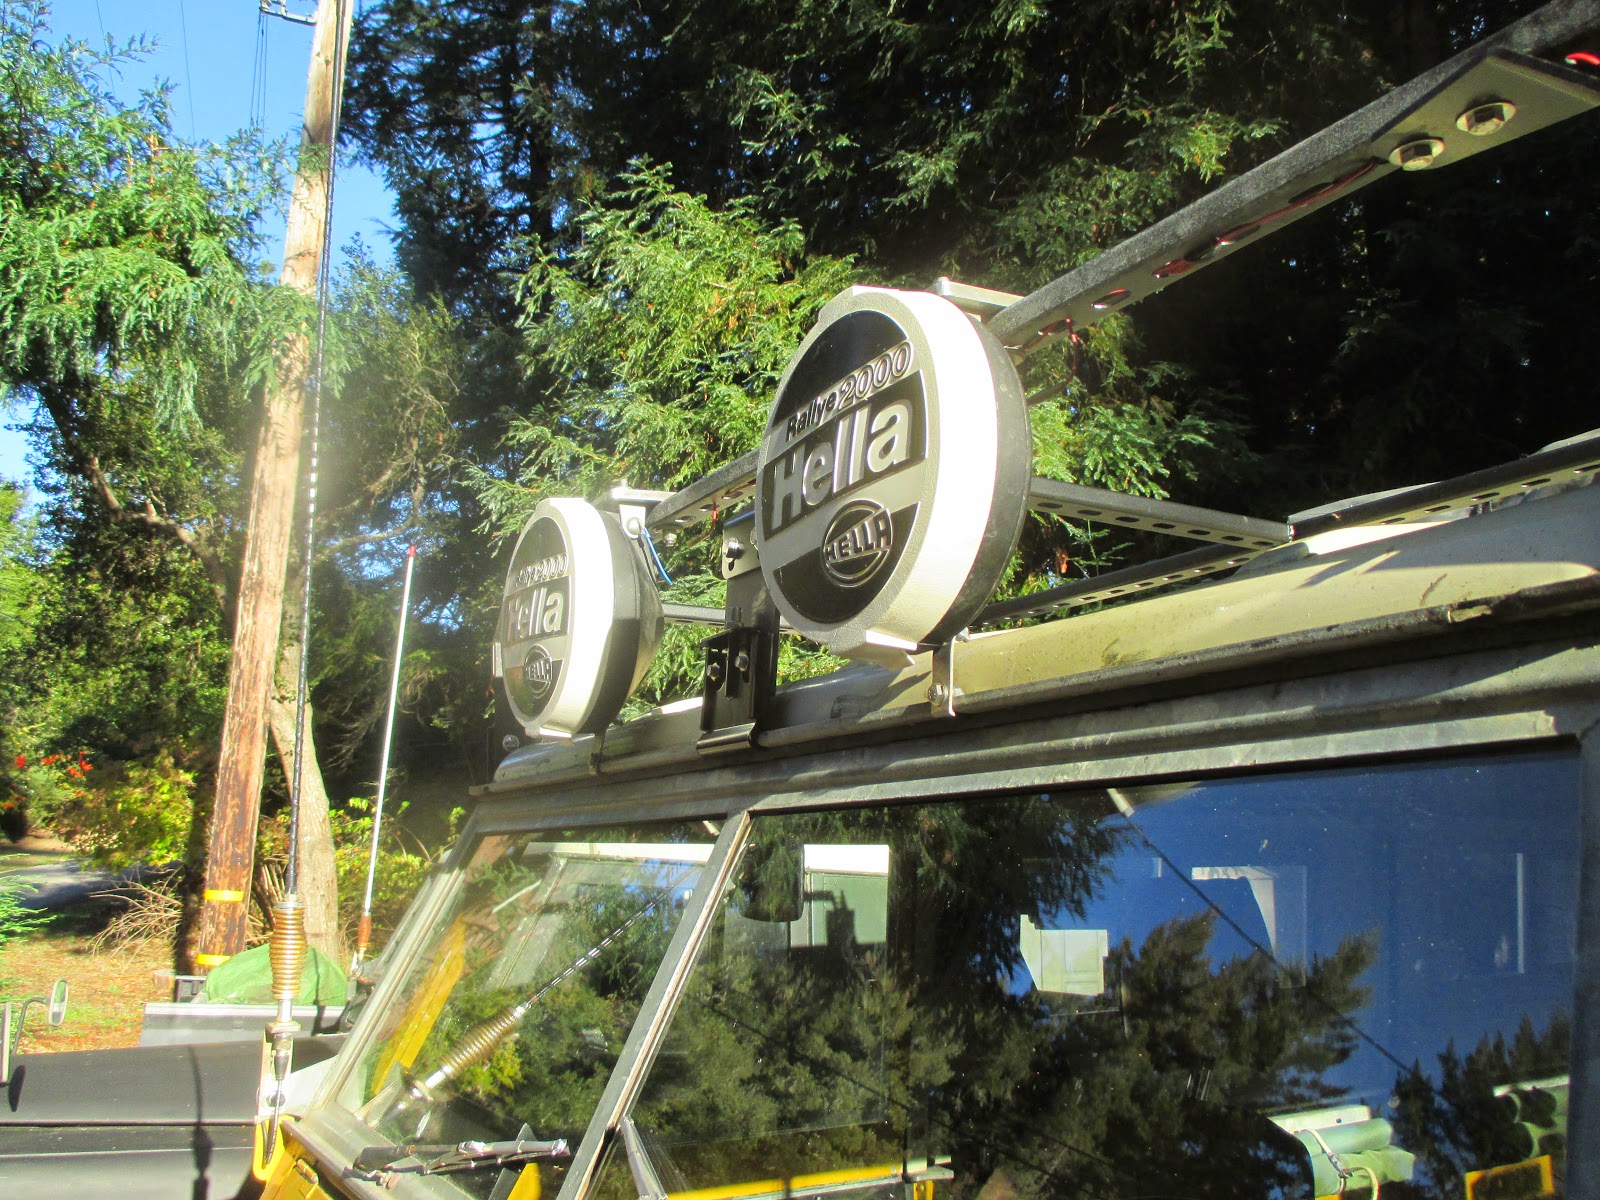
I then reengineered the lite mounts by using some 1/4 x 2" aluminum bar stock I had and made some flat, less tall mounts. The allen bolts I originally used for theft prevention were already rusting so I went with 3/8-24 2" stainless bolts and grade 5 nylock nuts. Whilst this quieted the vibration a lot I still had enough to worry about the light beam getting out of alignment. The Hellas came with some braces but I didn't get them from the PO, so I made my own. There is a local guy who buys and sell machine shop tools and he has scrap metal, from him I bought a piece of 13ga SS 5x12". I cut out 2-5"strips.

center punched them

drilled pilot holes

and the final 1/4" holes

at the same time bending and fitting as I went. These were bolted into the lite housing using the supplied holes;

The lites were re-installed and using a thick washer on the back side of the brace clamped to the rain gutter. I also added a roof rack mount to the center of the roof and the rack, I can walk on the rack with confidence that I won't bend anything on the lites.

With that the vibration ended and now it is solid!
You can see from the pics I need to get some flood lites next time, these spots allegedly reach out 750meters.
Headlights only;

Spots before all brackets were on.

So I have been asked for more detail.
Here is a picture of the top mount and how the lite bracket is bolted to it and it to the roof rack, you can see I've run the wiring inside the SuperStrut.


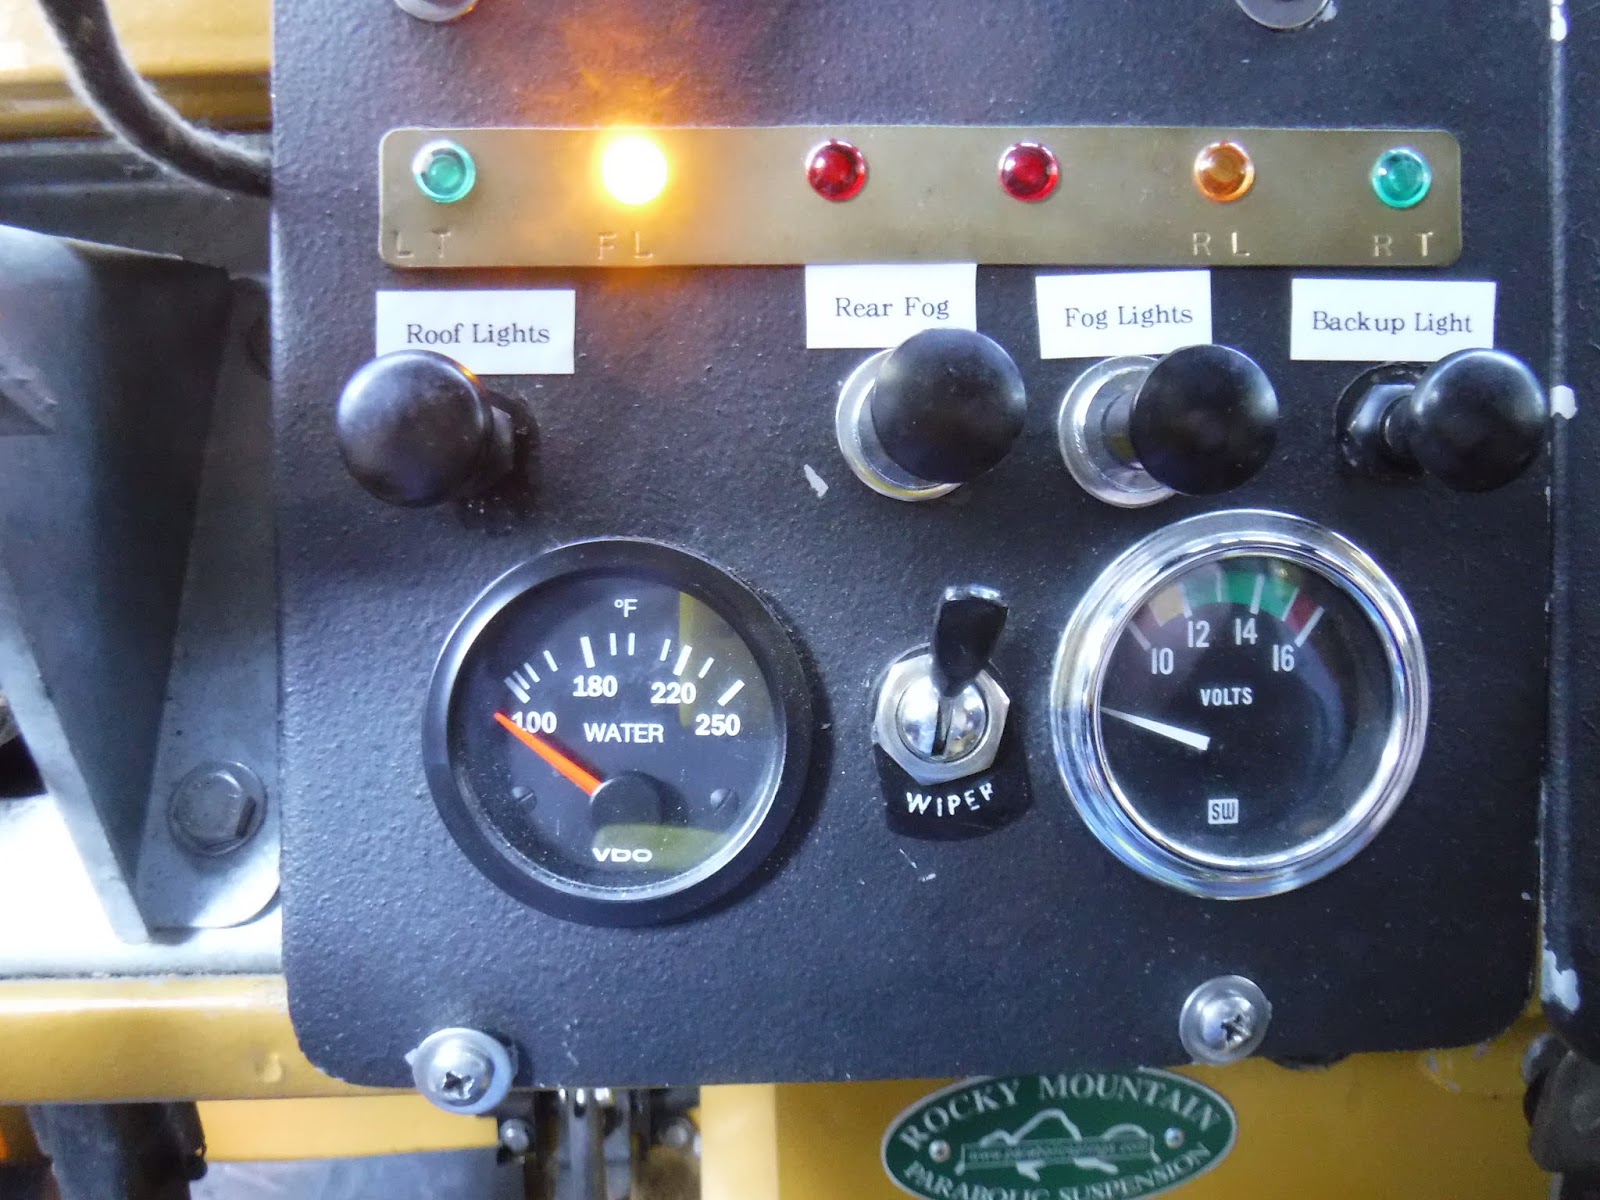
I brought this wire back through the bulkhead and along the parcel tray where I tapped in for the idiot light. Here is the panel with the light switch on the left and the yellow idiot LED on.
The back of the panel looks like this( I like my wiring long so I can get in and do work):

From the relay the wire comes out the side of the parcel tray where it runs up next to the windscreen.


From there I ran it under the door seal and in the junction of the roof windscreen. Here you see it as the dark red wire.

On the outside I just ran it on the roof rack mount and tried to keep it from possibly getting snagged on branches with wire ties.


Then just along the inside of the rack where it splits for the 2 lites.

Ground is through the light case and the mounts.
No comments:
Post a Comment