Saturday, May 16, 2020

white gas to propane cook stove conversion

15 May 2020

I have been using a Coleman 425E dual burner cookstove that I refurbished. I made a mount for it in the right rear of my 109 land Rover.  You can read about that here;   https://poppageno.blogspot.com/2019/03/land-rover-cookstove-storage-option.html


While it did the job and has some advantages over propane I really wanted something that burned cleaner and was easier to store. Plus I could use the propane for my Lil buddy heater.
   Once I made up my mind I pulled the trigger on a used Coleman stove on Amazon. The description said the box showed wear and tear, and gave no hint that the stove itself was damaged.
    When I opened it up I could see things were in disarray.


Further inspection showed the left burner was at an angle.


I looked and could see the burner was bolted to the bottom pan and the pan was bent. Below you can see the bend and normal burner/pan connection.


I removed the burners and valves to see what was what.


I took the pan to the garage and using body tools flattened the pan back into shape.


Now the burner sat properly.
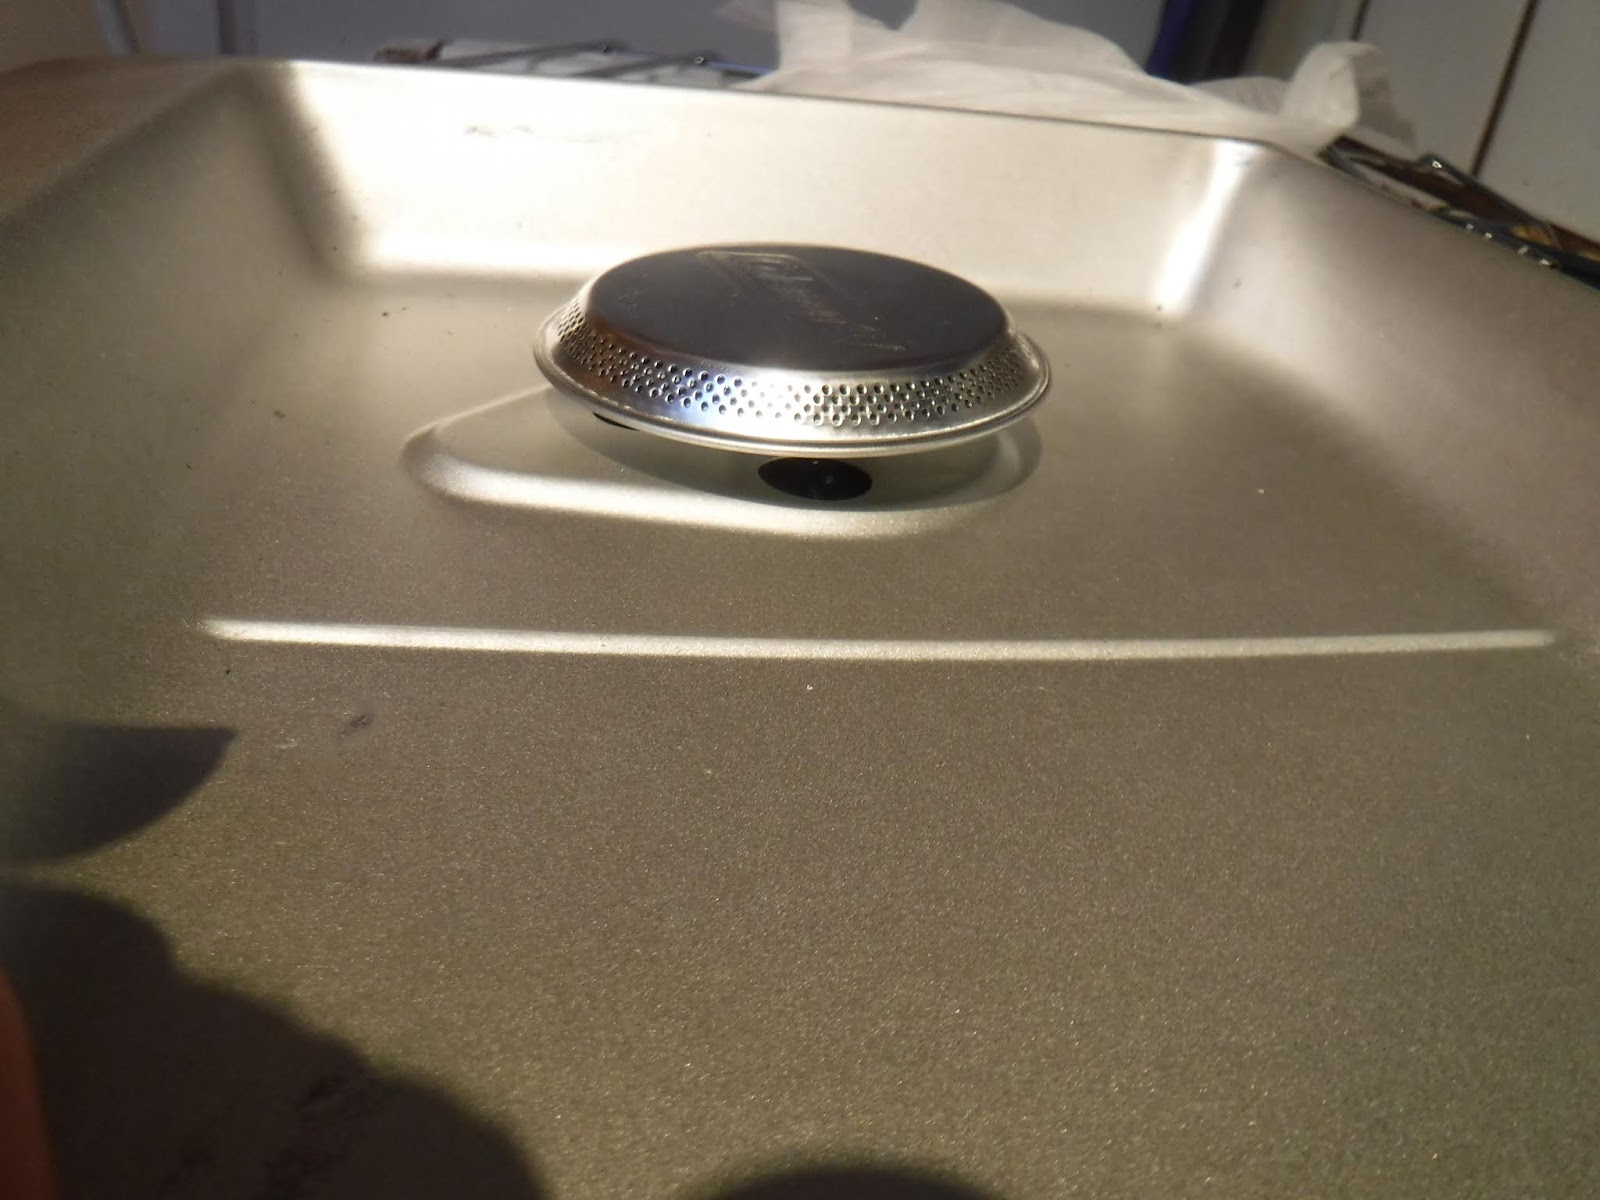


I put the stove back together and fired it up to make sure it worked.


I tried boiling some water with my Stanley cookset and found the space between the bars on the grill were dangerously far apart. So I made some grills(?) out of expanded steel, wishing I had stainless...


These worked like a champ and showed an uneven burn circle on both burners, Interestingly.
    After a cup a joe I went to mount it in my 109, Crap! it wouldn't fit in the same space as my white gas stove!! Trust me I tried many ways to make it fit. I really wanted it by the rear door for easy access and permanent stowage. You know 1 less thing floating around.
     But I just couldn't get it to fit and didn't come up with any other spot for it.

So I took a break and went down for the mail with my neighbor John. He had offered me a couple weeks ago, a lightly used propane stove he had but had lost the propane cylinder adapter. Checking out his stove I found it was a discontinued brand Northwest Territories, sold thru Kmart. So I passed on it and bought the one I got.
    John came up to see my stove dilemma and while talking to him I came upon my solution. He gave me his old stove and I took it, but didn't use it. It did give me some comparison points though as it is virtually the same size as the white gas 425E stove.
Here is all 3 stoves laid out for comparison.


So I McGyvered it. I gutted both of my stoves


And did a test fit of the propane burners into the gas stove


Then I saw my idea was doable so I marked for the valves and drilled 5/16" holes for the them.


I used a 1/2" pipe knockout punch for the adapter hole.


Followed by some Creative tubing bending and the right side burner hole had to be drilled to 5/16" also.


I reinstalled the knobs and the grill, hooked up the adapter while checking for fit.


Added a propane bottle and fired it up! The burners sit in the same spot as the gas ones.


While that took hours to do I decided that I wanted to add the inner pan from the propane stove, thinking that it would add some heat protection to the exposed tubing. That I would do the next day.

16 May 2020
     I started out by marking the centerline and splitting it in half since it was longer than the 425E. Then I could visually center the burner over the correct hole and mark other sections for removal. Once each side fit I installed a 1/8" pop rivet in each end to keep it in place where they overlapped. Then I could test fit the whole shebang.


It looked good to go except that it flopped around :^(  Next up I bent some 1/8" x 1" flat stock and made some supports. Drilled where necessary and bolted them in after painting with high temp silver.


Now that it sat good I put 2 more poprivets in the centerline.


I really wanted to solder it so the pan was leakproof but I just couldn't get it..... So I painted everything up with the high temp silver to hide my flaws.


And after lunch and dry paint I put the 425E back together. I suppose I should call it a 425P now...


In order for the lid to fit I had to notch the back corners about 1/4" x 2" and the front corners were hanging up a little so I angle cut those.
The last McGyvering I did was to add a rare earth magnet to the inside of the lid. This will keep those wind guards from flopping around when opening and closing the lid. I attached it with Shoe-goo, otherwise it slides around when the guard is pulled open.


And it all fits in the 109! :^)

UPDATE 6 Oct 2021

I put all the white gas stuff back in and bought a Stansport propane converter;  
https://stansport.com/propane-converter-185/

I also dumped the expanded steel gill and made a simpler fix;
https://poppageno.blogspot.com/2021/10/coleman-stove-grill-fix.html

Friday, March 20, 2020

Covid-19

Wow!  I never thought that there would be this kind of disaster in my lifetime. I always thought it would be nuclear war or a massive earthquake( I live in Calif) or on the outside a super volcano. None seemed likely, then this.
     So today I sit at home, nothing unusual there, with my life kinda on hold and have not been out in public for 8 days at this point.
    The other day one of my neighbors dropped off some soup she makes periodically, she asked me on the phone if I was worried she could leave it on the porch. I told her I wasn't worried, then I met her dressed like this;


   A coupe of days ago one of my ex-neighbors called to let me know she was thinking of me and if I needed any shopping done she would do it for me since I am in the "vulnerable age group". I don't feel old at 69, but mentally I know it is old.
     I hear about peoples going out to go camping in the desert overwhelming towns like Bishop, CA with crowds in unprecedented numbers.
    Hey! It is not a paid vacation! Stay home! Stop spreading the damn virus!
Finally Calif put in a stay home directive.

Here is what can/will happen;  https://www.youtube.com/watch?v=_J60fQr0GWo

Be safe!

OH and my own kids,...................................................nary a word.

Saturday, February 22, 2020

Land Rover trailer legs

If you have followed this blog you know I have a trailer made from an 88 tub. Due to the pivot point of the axle there is not enough weight forward of it to allow for 200# me to sit on the tailgate or inside the bed.

So I need to have something to stabilize the back when not hooked up to the 109 hitch. I thought up some elaborate hinged folding legs, but they were to complicated for my taste. You know me, KISS!

Next I dreamed up these legs. I just needed to find a way to attach them. Hmmmmm...

Screw on legs, But how? Where? Outboard would be best. Then I remembered the holes cut in the bottom of rear crossmember. Those would provide access for my plan!


I obtained some large bolts and nuts. Two of the nuts I welded to the ends of some conduit so the bolt could thread down the inside.


The 2 bolts I put in the upper part of the crossmember. To do this I needed to find the center of the lower hole and mark it in the upper steel. Then a series of holes drilled to fit the diameter of the bolts. That was the easy part.........In the above pic you can see a triangle brace on the tub above the crossmember, well this is in the way of dropping in the bolt.


Plus the side of the quarter panel is in the way of getting a wrench on the locknut.
I had to unbolt the tub from the rear crossmember and jack up each corner in turn to drop in the bolt and tighten the nuts.


After it was all rebolted together it looked like this with the legs on.


Yesterday I made some 2" round discs for feet and welded them on to the legs. And painted everything all up. I used yellow paint 'cause it is in my color scheme and very visible if laying on the ground when packing up.


The trailer with the front hitch leg down for support the rear legs can be brought into play. This makes the trailer stable both fore and aft and side to side.

Then I got the idea I should have used quick disconnects............

Thursday, February 13, 2020

Afton Canyon campout

   On a Friday morning I loaded up my 109, Fluffy, and headed to the Mojave Desert to join friends for our first trip on the Mojave Road, https://www.nps.gov/moja/planyourvisit/mojave-road.htm .

I got 2 miles and was fumbling with the gps cause it wasn't connecting to the satellites. I stopped on the side of the road and fumbled another 20 min with no luck. So I went home for the manual, which I couldn't find, then I went online........there isn't just a single "use with gps on/off" setting. So I lost an hour there, FRUSTRATING!

It was now 1100 and I was heading out, I was going to be at the meeting place, Afton Canyon Campground, a half day ahead of the others so there was no rush, It was just going to be a loooooong day. Even more so as road construction seemed endless in some places and following trucks up some of the single lane highways slowed me down.

Stopping for fuel I noticed an oil puddle of drips under my engine so I popped the bonnet and it appeared the return oil hose for the turbo had gotten loose again. The engine was too hot to effect a repair so I kept an eye on the oil level and kept going. At one point I hit 70 on a downhill passing a semi. Mostly I kept it around 60-62mph. I had a moving average on the gps of 45mph.


 I pulled into camp around 2100 and found a campsite, there were 6 of the 23 campsites full, and woke up to this;


It was chilly and the sky was blue as a glacier. I fixed breakfast and took a look at the oil leak, got out the tools to tighten the hose clamp on the oil return line and the compression fitting on the dipstick tube and a flashlight. Threw down a piece of carpet to lay on and crawled under. There it became apparent that the hose clamp was not loose, must be the compression fitting....as I put the wrench on it I noticed the tube was really loose. I cranked on the already tight nut and the tube stayed loose. Crap!
     I crawled out from under and found I could wiggle the dipstick tube quite a bit.

This could only mean 1 thing, the dipstick tube had cracked. Taking a few minutes I figured out a plan; Check the oil level, fill if necessary, pull off tube, plug hole.
And that is what I did.

Taking a piece of firewood I brought I whittled a plug;

Then I jammed it in the hole with the help of a baseball bat( to reach down in there) borrowed from a fellow camper. Thanks Jim!

I even had the forethought to ziptie the plug to the oil return line!
Now I was thinking "Good to go! Bring on the Mojave Road!" It was about 0900 and Drew wasn't due until around 12-1 that day, coming from Salt Lake City. Here are some pics of the camp;


I really like the BBQ and fire pits they have here. The roofs for shade over the tables leave a LOT to be desired, waaaay to small.

Packing up my gear in anticipation of pulling out when Drew showed up I got to thinking. Finally deciding that going on the Mojave Road wasn't the best decision I could make here. Making up my mind to camp here for a few days (Hey, I'd driven 433 miles to get here!) and if the plug fell out whilst driving I would get quicker help on the highway than out in the middle of nowhere in the Mojave Preserve.

Walking around I found a better campsite and moved there. Was setting up my awning when Drew and Ken arrived at noon. I showed them what happened and told em my decision to stay as difficult as it was. They took a look at the water crossing and decided to use the Rasor Rd go around.


After they left I finished setting up my camp, not setting up my Oz tent instead opting for sleeping in the 109. The moonrise was awesome;


While the sun set in the West;

It was really windy that afternoon and night. I had every guy rope and stake on my Batwing awning. The 109 rocked all night in the wind, I was glad I had not set up the tent.
Earlier in the afternoon I met Rebecca, I had seen her ride her fatbike up to the water crossing and turn around. She had decided to camp there before heading back out to Baker. We talked a while as I have also done some bicycle touring. She has been riding about a year, rides on the weekend and holes up where ever she stops either camping or airbnb while doing her online job. Rebecca sold everything and just owns what she carries on her bike. Rebecca if you read this say Hi!

Sunday and there was only 3 of us in campsites and by mid day the others had left. I walked around and picked up blown trash in the camps, took down those little slips of envelopes showing you paid from some campsites, the oldest being Jan 30, it was Feb 9.


Then the clouds rolled in and there were some sprinkles. I took some pics of the area, There seemed to be half a dozen trains come thru each day, incredibly looooong trains. I counted one of them, it started with 3 locomotives and 73 cars later was a 4th locomotive followed by 71 more cars for a total of 144 cars and 4 engines. They seemed to go by forever.


That night was again windy and much darker as this moonrise pic show.


I did have a fire and read a lot of my book, made pancakes for dinner, howled at the Moon. Yet through all that I was disappointed and apprehensive of the trip home. Deciding I wasn't having fun I figured on pulling up stakes in the morning and risking the drive home.

    The morning dawned cold but wind free so as my water boiled for oatmeal I took down my awning and finished as the first breeze said good morning. I ate and packed up, hit the road.


It was only a few miles to the highway and I stopped twice to check the plug, So far so good. The pavement on Hwy 15 south to Barstow has a rest stop on it, Only about 6 miles at highway speed so I stopped and checked, so far not a drop. I breathed a sigh of relief. Passed through Barstow and on some lonely overpass I checked it again. Still dry.

I figured I was golden then and didn't check it again until I got fuel on the East side of Bakersfield on Hwy 58. There was a wet spot on one side, but by then I had done 165 miles and climbed the Tehachapi Mountains and hit 73mph on a downhill. Still just a small damp spot! Again I tried to keep it around 61-62mph, the gps showed a 42mph overall average.

Fluffy got  around 21mpg on the way down and  18 on the way back. This had me scratching my head for awhile thinking my math was screwed up. Then I remembered how windy it was on the way back, and I was driving a brick............

Once home I unloaded everything and had a good nights sleep. The next morning I dug out my spare dipstick tubes, all 4 of them(don't ask).  I pulled the plug out.

 Putting a 7/8" socket on my extensions, removed the compression fitting. I needed to know was it fine or coarse thread so I could put the right spare in. Here is the old compared with a straight tube;


I checked the curved vs straight dipstick to see if there was a difference and there is.


 I decided to use the curved tube as it has a bracket already at the top and if I am thinking correctly(Hey! I heard that!) will put more oil in my engine hopefully helping with cooling. What I knew was the curved one was for a Discovery and the straight for Series and Defenders and I had a Discovery block.
Carefully putting it in my vise I slowly straightened it, as when bent it wouldn't fit. Then I screwed it in, looked around for where to put a bracket. I landed on one of the engine hoist bolts. Using some 1/8 x 1" flat stock I drilled a mounting hole and test fitted, measured, marked, removed, cut, test fitted, twisted, measured, cut. Found a 1/2" piece of flat stock and cut, drilled and welded it to the longer piece then reassembled. Did some fine tweaking with the twisting, removed it and painted it.


Then I had to go to the hardware store and get a 20mm combo wrench to tighten the compression fitting. This wrench had to be chopped in half and the closed end have a slot cut into it to fit around the tube, as in a line wrench. Once this was done I tightened up all the fittings. The bracket is gray in the pics.


 Firing up the engine there were no leaks and the dipstick tube wasn't vibrating all over the place. Success!

Just for safety sake I put my straight spare tube in my spares box AND welded up my old compression fitting to use as a plug if need be.


 Always an adventure!