20 Sept 2024
Over the years some of my passengers and in some instances myself, have struggled to get in my 109. Mainly due to the 24in tall first step.

To assist my passengers I usually carry a portable folding step. This shortens the distance.

While I would really like to install a rock slider/step, the cost and weight keeps me from doing so. The weight would be around 200# for the pair of sliders with tree slider/step. That is 200#'s taken away from my GVW.
Now I look at YouTube. I watch Trail Mater go on recoveries in the Moab area.
https://www.youtube.com/@trailmater
Rory has some chain hung steps on Trail Mater and I decided to see if I could make some for my 109.
22 Sept 2024
Starting out looking and measuring things in a feasibility study.

It was determined that it would be relatively simple. Next was a trip to the local ACE hardware and I picked up 4' of 1" x 1/8" angle iron and 4' of 3/4" square tubing and 24" of chain. Cutting off enough to go an inch past my existing bolts on each end I found the centers and punched them for the drill.


1/4" holes were drilled in both brackets to be.


I cleaned them up and then cut the "step" out of the square tubing the same length.

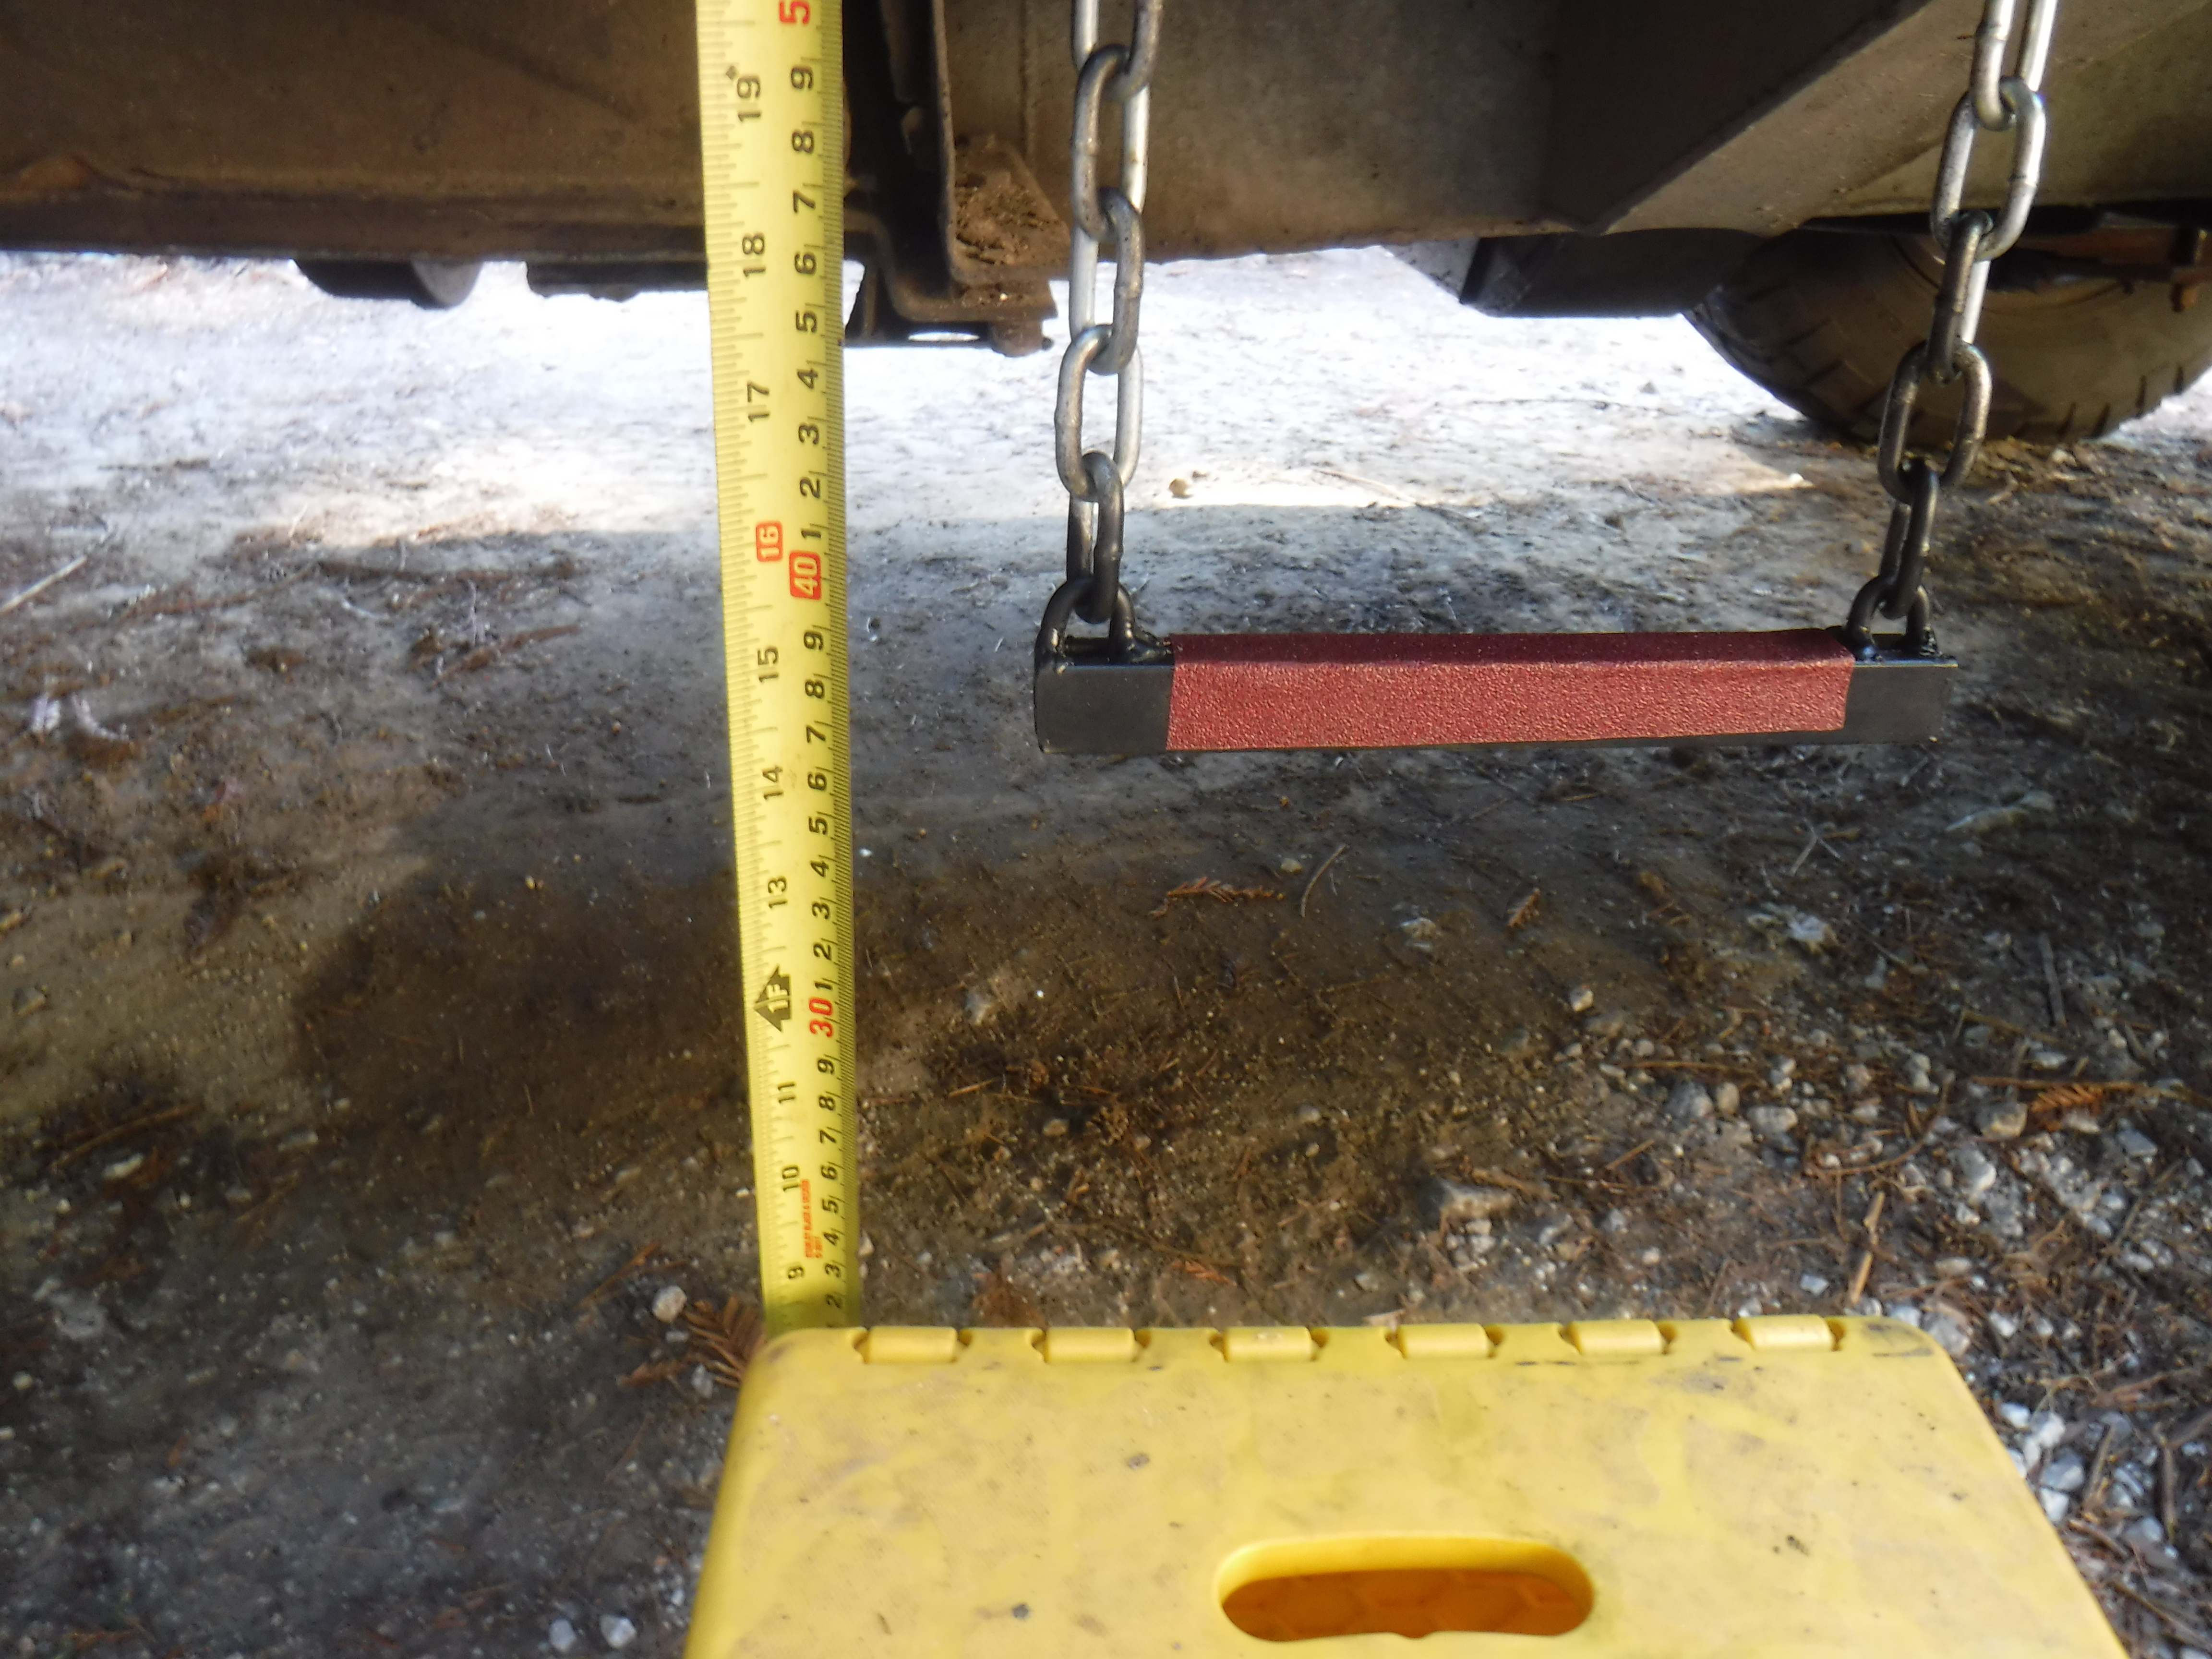
My feasibility study determined that an 8" drop would be the best option. Including a test fitting of the bracket and measuring the distance to the fuel tank. I didn't want the steps to hang too low.


The step was laid out on my welding table, I needed 10 links per side or 20 per step.

It took a lot of clamps to hold everything in place as I welded the chain to the bracket. Then the bottom chain link was cut and I marked out on 1 of the tube sides a slot for the end chain to sit and get welded in. I welded the top side to the chain on the outside and the inner chain to the bottom inside the tube.

Keep moving, These are not the wonderful welds you want to see.......


I got the first passenger step done when I realized I needed more chain, 10 more links to be exact. I soldiered on! The luxury black paint out of a can, was applied after wire brushing and final grinding to make things look more nice, nice. After drying I cut out a bit of a self stick sanding disc and applied that. Then I hung the bloody step up!


I didn't test it, it was hot out! A couple hours later I asked a local dogwalker to try it for me and give me some feed back.
She thought is was fine and maybe needed some orange paint on the step and grab handle. I tested it after her, I'm 5'10" she is 5'4". I had no problem getting a foot in and boosting myself up, I did find it awkward to get my second leg in and hips turned to the seat.
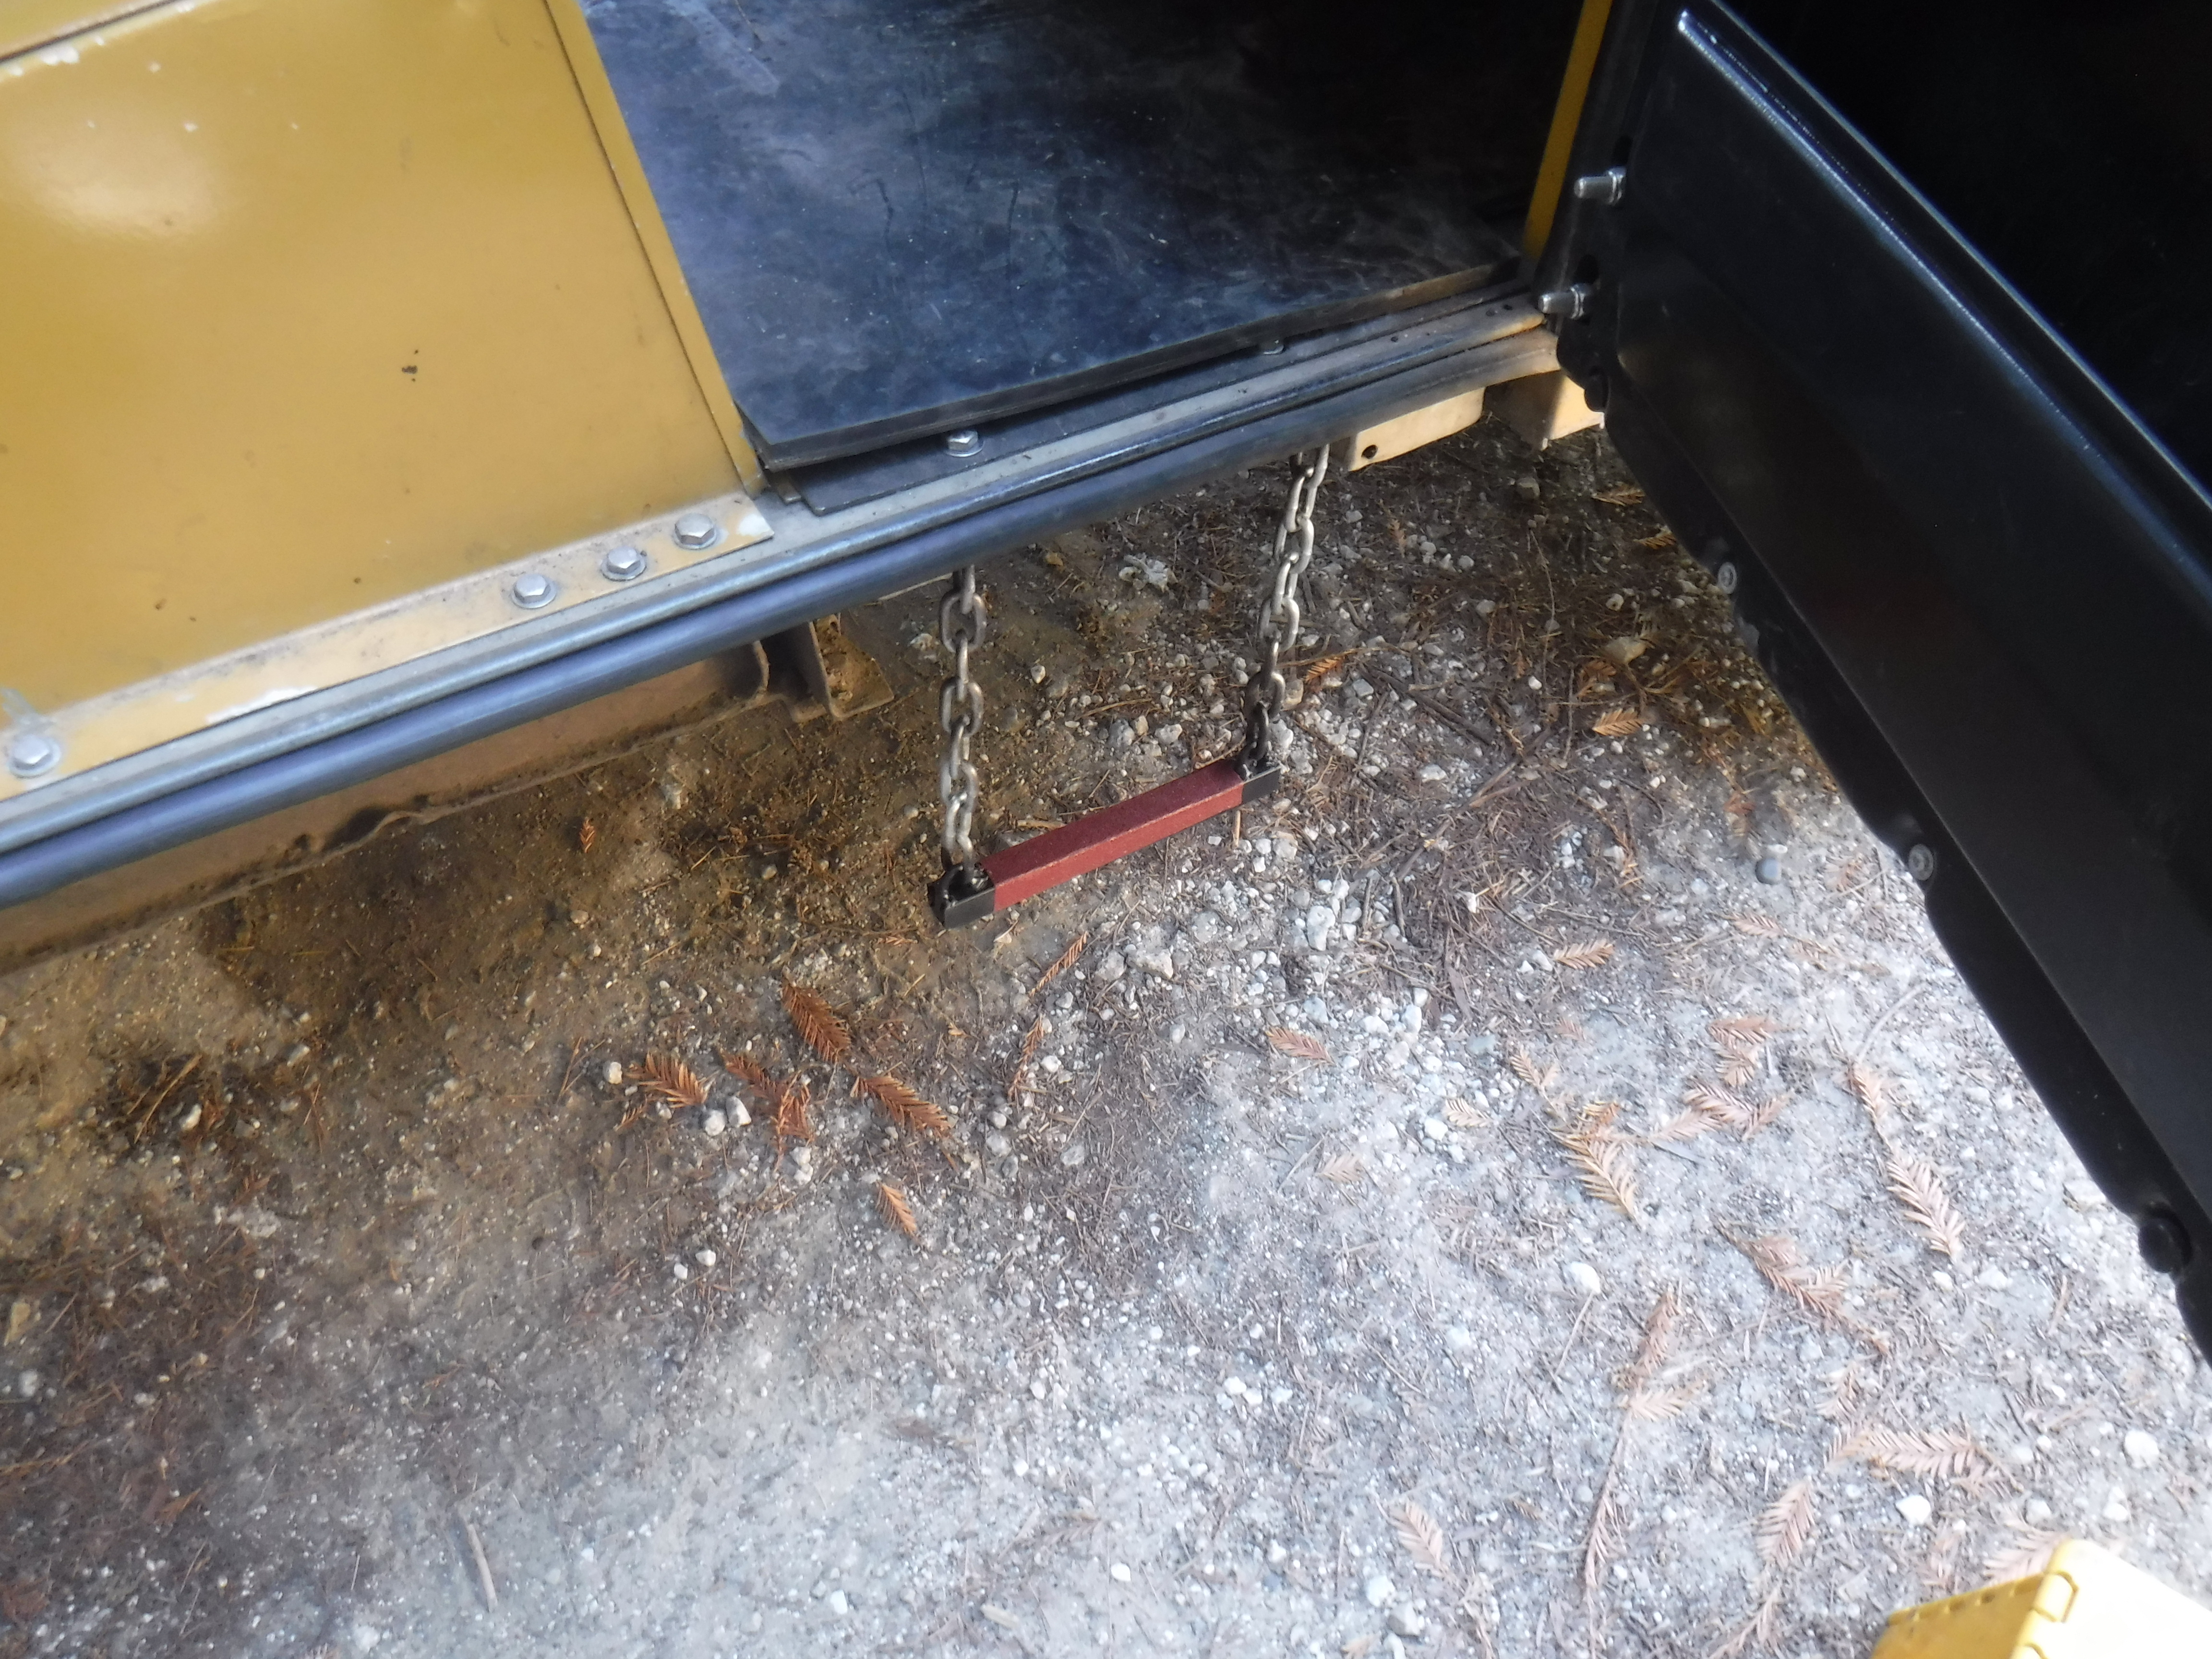
The following pics show how it relates to my portable step and how it looks hanging there.


23 Sept 2024
I waited until this morning to go buy the missing links. (see what I did there?) Then I finished making the drivers side step.
On the way home one of my neighbors was out walking her cat, in a stroller actually(the cat not my neighbor). I asked her to try out my passenger step and give feed back. She put one foot on it and said No, no, it's too loose! She wouldn't go any farther. So 50-50 at this point.

Here is when I noticed that the driver side bolts are 1/4" while the passengers are 5/16" WTH?
Just as well, I grabbed another 1/4-20 bolt and nut and washers to replace the missing one. It all bolted up fine and looks the part hanging there.


Of course I had to try it out. It does swing inboard when you step on it, making it a bit awkward. Methinks it will be more useful on uneven ground when the floor is a meter up. Now I have to see if my neighbor with the stroke can get in, or will he still need the portable step. He rides the most with me.
It's pretty useless for getting out.