Because I have been working on the 109 and driving it the 88 has sat. Now I have reason to drive it again with all the oil leak and the ring issue of the 109.
The 88 it turns out developed a big oil leak where the fuel pump mounts. I cleaned it up and saw that the oil was coming out what appeared to be the bolt hole on the rear of the pump. So I pulled that out and put some RTV on the shaft and reinstalled it . It helped but now the only leak was from the bottom of the pump. So I pulled the pump and sealed the adapter on both sides, thinking the gasket had dried out and reinstalled it. It leaked worse....
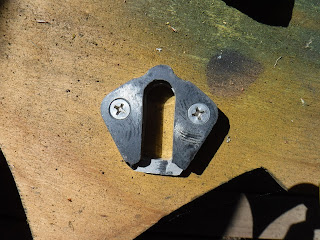
I took off the pump and the plate it attaches to on the engine to see what was going on. I don't know why the adapter was added, the new pumps have a longer lift arm to compensate, perhaps it is to help with vapor lock due to engine heat? Cleaned everything up and found the bottom of the adapter was broken on one side and cracking on the other.
But that's not the end of the story....
Now I knew that the plastic adapter will at some point fail, and I have no spare. I figured I could do better. The adapter is 3/8" thick all I needed was some aluminium flat stock and I could make one. I searched my stockpiles and didn't find any. So I hopped on my Suzuki and went to my welder Daren at Arc-Tec where he found a piece of scrap I could have. Thanks Daren!
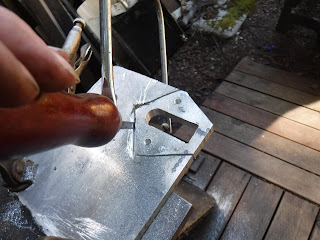
At home again I clamped the adapter to the flat plate and marked the centers for the mounting holes. I drilled these out to take a 1/4-20 thread.
By the way I found I could keep my taps and dies in these Plano brand boxes. I have one for SAE and one for metric.
Chamfered the holes on the adapter to take a tapered 1/4-20 screw so to keep the adapter steady while I worked on it.
The slot is slightly wider than 11/16". I marked a center for my hole saw and pre-drilled it with a 3/16" bit. Then I used my wood bits for the soft aluminium.
Worked a treat and the first hole was done, Next a bottom hole.
You can see in the pic just above that the bottom of the adapter fell off. I held the piece in place and scribed the outline for the bottom.
Clamped to my welding table out came the jigsaw. Well it did a reasonable job until the teeth plugged up with alli...
I had to finish off the cut with a file, took about 5 min per side.
Eventually it was done, I was able to cut most of the outside with the saw but had to finish it off with a coping saw. That left an ugly cut....
It took me about 2 hours to get one made, but I got it!
The mounting holes were drilled out to accept the 5/16" mounting bolts and remove the 1/4-20 threads. Here is a pic of the original and my final copy which now sits in my spares kit!
Update 27 Jun 2018;
Here is a pic of how the 1991 Disco LR 200TDI I have fuel pump mount is made.
Cast aluminum with a raised section for the fuel pump with the longer arm. Part #ETC7929 I think it would fit on Series blocks also, but kinda expensive. Shop around, I see them as low as $35US to $250US.


No comments:
Post a Comment