Because of this demand and the fact of the limited production of Defender style manifolds, IF you can find one, sellers are asking silly money.
Now my old engine the 19j, commonly called the 2.5DT had a turbo and the fellow I bought the Disco engine from also had a 19j turbo and manifolds, plus he had paperwork explaining how to adapt the 19j to the 200 by a guy in Holland. Basically it said to hold everything on with a bar across the top. To me this sounded more like a bodge and I knew it could be done better.
So taking the 2 sets of manifolds down to Arc-tec Welding along with a 200 manifold gasket for a template I asked Daren to add some holes in the proper places. Daren is a very good welder and can do cast iron and does small jobs for folks.
What he did for the exhaust was cut off the old holes and take the flanges off the extra manifold, from these flanges he sourced new bits with the holes and welded them in the proper location.

Here's the other side after being surfaced.

On the intake side he just welded on some 1/4" plate and drilled holes in it.


So Monday I got home late after running errand and helping Brett with his RRC and I tried the manifold on the head. The intake went on no problem, but the exhaust wouldn't go on. I removed the intake to see what might be the issue, it seemed the holes were not big enough and sure enough a M10 bolt would not pass thru 2 of them. So I reamed them out and tried again. Still a no-go. So using the correct sizes, M8-M10, I bolted the manifolds to the gasket and sure enough 1 of the holes on the end was about 3/16" off. End of day.
The next day after doing some necessary business I took the bolted manifolds down to Daren to see what could/should be done. After some discussion he welded material on to the outside of the flange and the inside of the hole to move it over and die ground it to the right place.

Bringin it home I put it on and it wouldn't go, so I tried a M10 drill in it and the hole was too small and needed to be reamed out, I did this with my dremel tool as so not to screw up the hole with a drill bit chattering about in it. While doing this I discovered that the die grinder had left the hole tapered and once the taper was removed the manifold fit the stud pattern on the head!!!!!!

Next up was to fit the intake and exhaust to make sure they play nice together.
A close look shows the left side exhaust hitting the intake flange as was the inner flanges.

So out came the grinder and some material removed from the intake.

And once again test fitted.
Went on just fine.
I then went about cleaning up the newly welded hole and flange so thing like nuts and washers and gaskets would seat right.


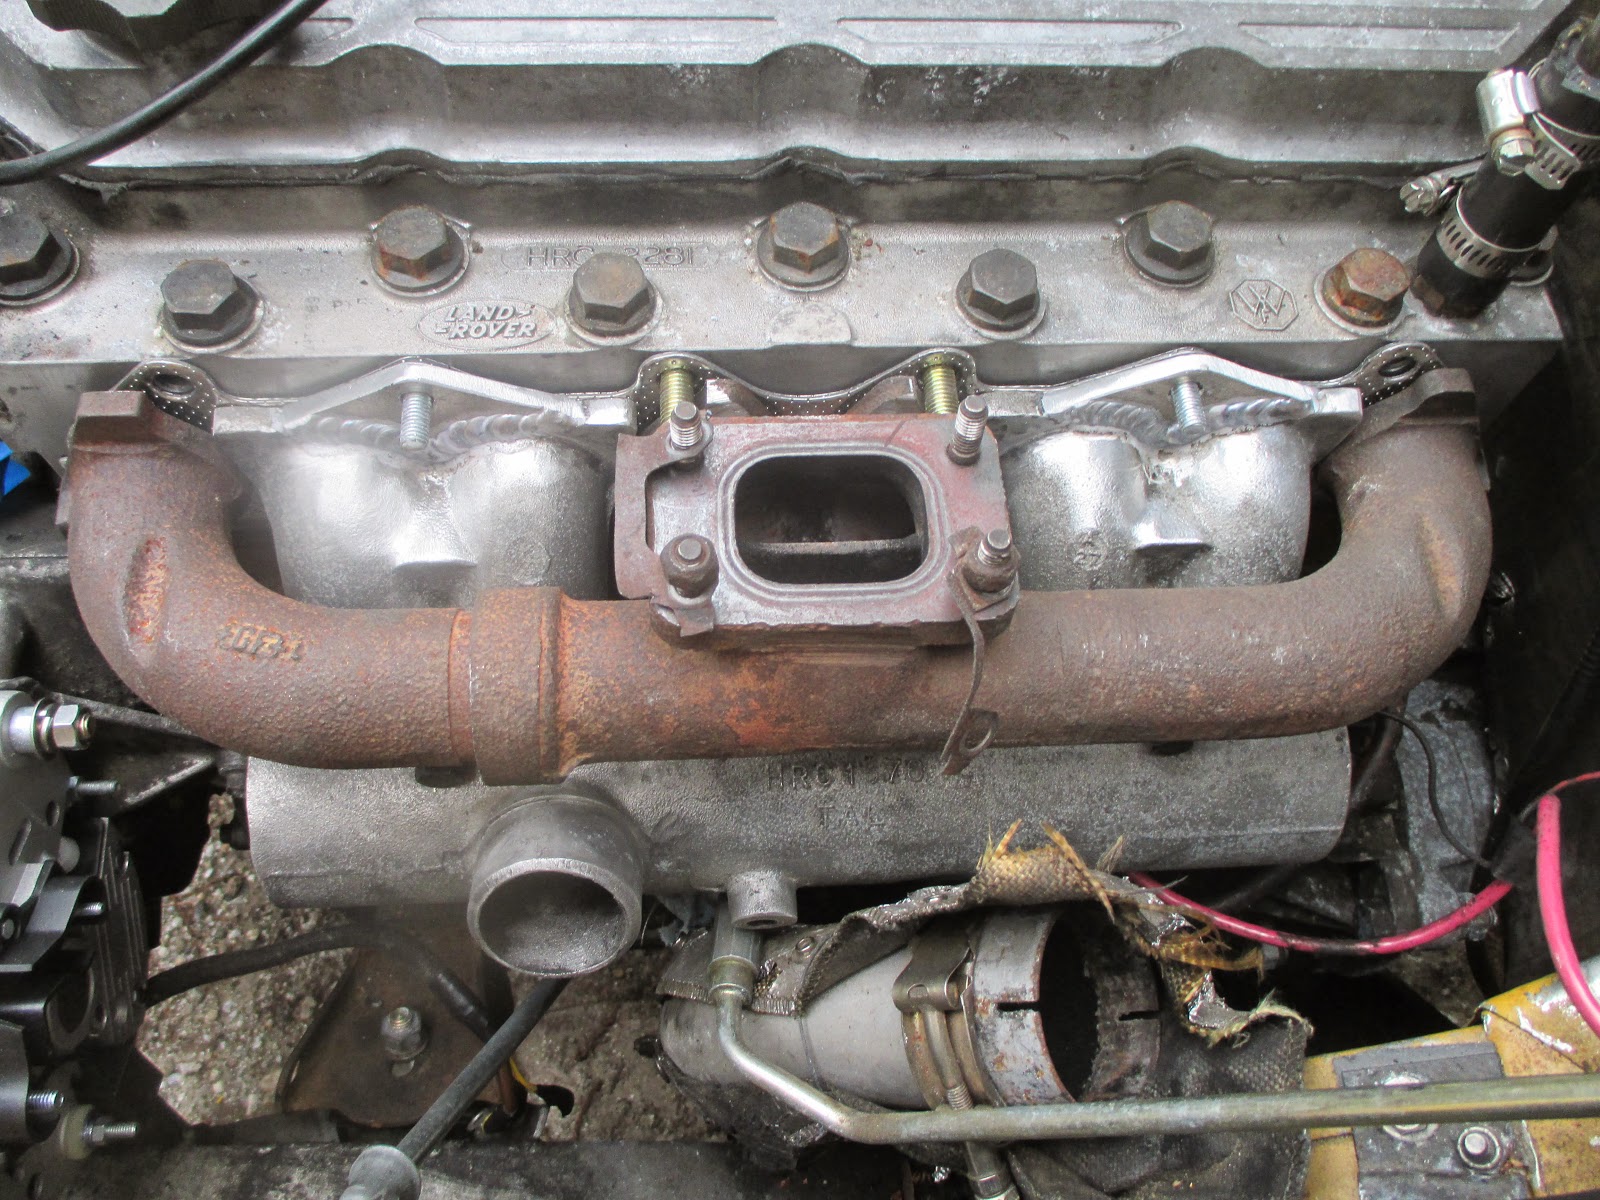
Perhaps you noticed that there are no holes in the top of the exhaust flange? Well Daren made some clamps out of 1/4" steel to hold both the intake and exhaust flanges.

The following pics show how they fit;


This last pic is of the center clamp in place

I am still awaiting the M10 studs to be able to mount this up.
The M10 studs came in today 3-14 and I fit stuff on but need 2 more M10-1.5x35 for the middle exhaust studs to make the clamps fit. More in the following posts.
Update; I've test fitted and the center clamp thing isn't going to work, can't get the nuts on, so I've taken it back to the welder and asked to have holes welded to the flange. He is having a tough time also due to the difficulty of access.
No comments:
Post a Comment